Welcome to the St. Petersburg Foodies Podcast Episode 130! On today’s episode, we interview Jim Pachence about how Serious Foodie explores the regional cuisines of the world and brings them to your kitchen with quick, easy, healthy sauces, spice rubs, recipes, and more. At the top of the show Kevin and Lori discuss … Continue Reading
Read moreCategories
- Best Places in St. Petersburg (55)
- Breakfast / Brunch Spots (8)
- Cheap Eats (2)
- Chef Interviews (5)
- Cocktails & Spirits (12)
- Coffee (17)
- Cook & The Book (4)
- Cooking Videos (10)
- Craft Beer (16)
- Desserts & Sweets (19)
- Drink Recipes (1)
- Events (25)
- Food Delivery Services (1)
- Food Stores & Ingredient Suppliers (5)
- Food Trucks (16)
- Foodie Trends (3)
- Foodies Cartoons (94)
- Foodies with Kids (2)
- Guest Chef (1)
- Happy Hour Food and Drink Specials (4)
- Industry (1)
- New Menu Items (6)
- News (125)
- Op / Ed (1)
- Podcast (157)
- Recipes (110)
- Restaurant Insider (3)
- Restaurant Menus (10)
- Restaurant Reviews (367)
- Restaurant Spotlight (20)
- Restaurants (122)
- stpetebeach (27)
- Wine / Wine Bars (5)
Recent Posts
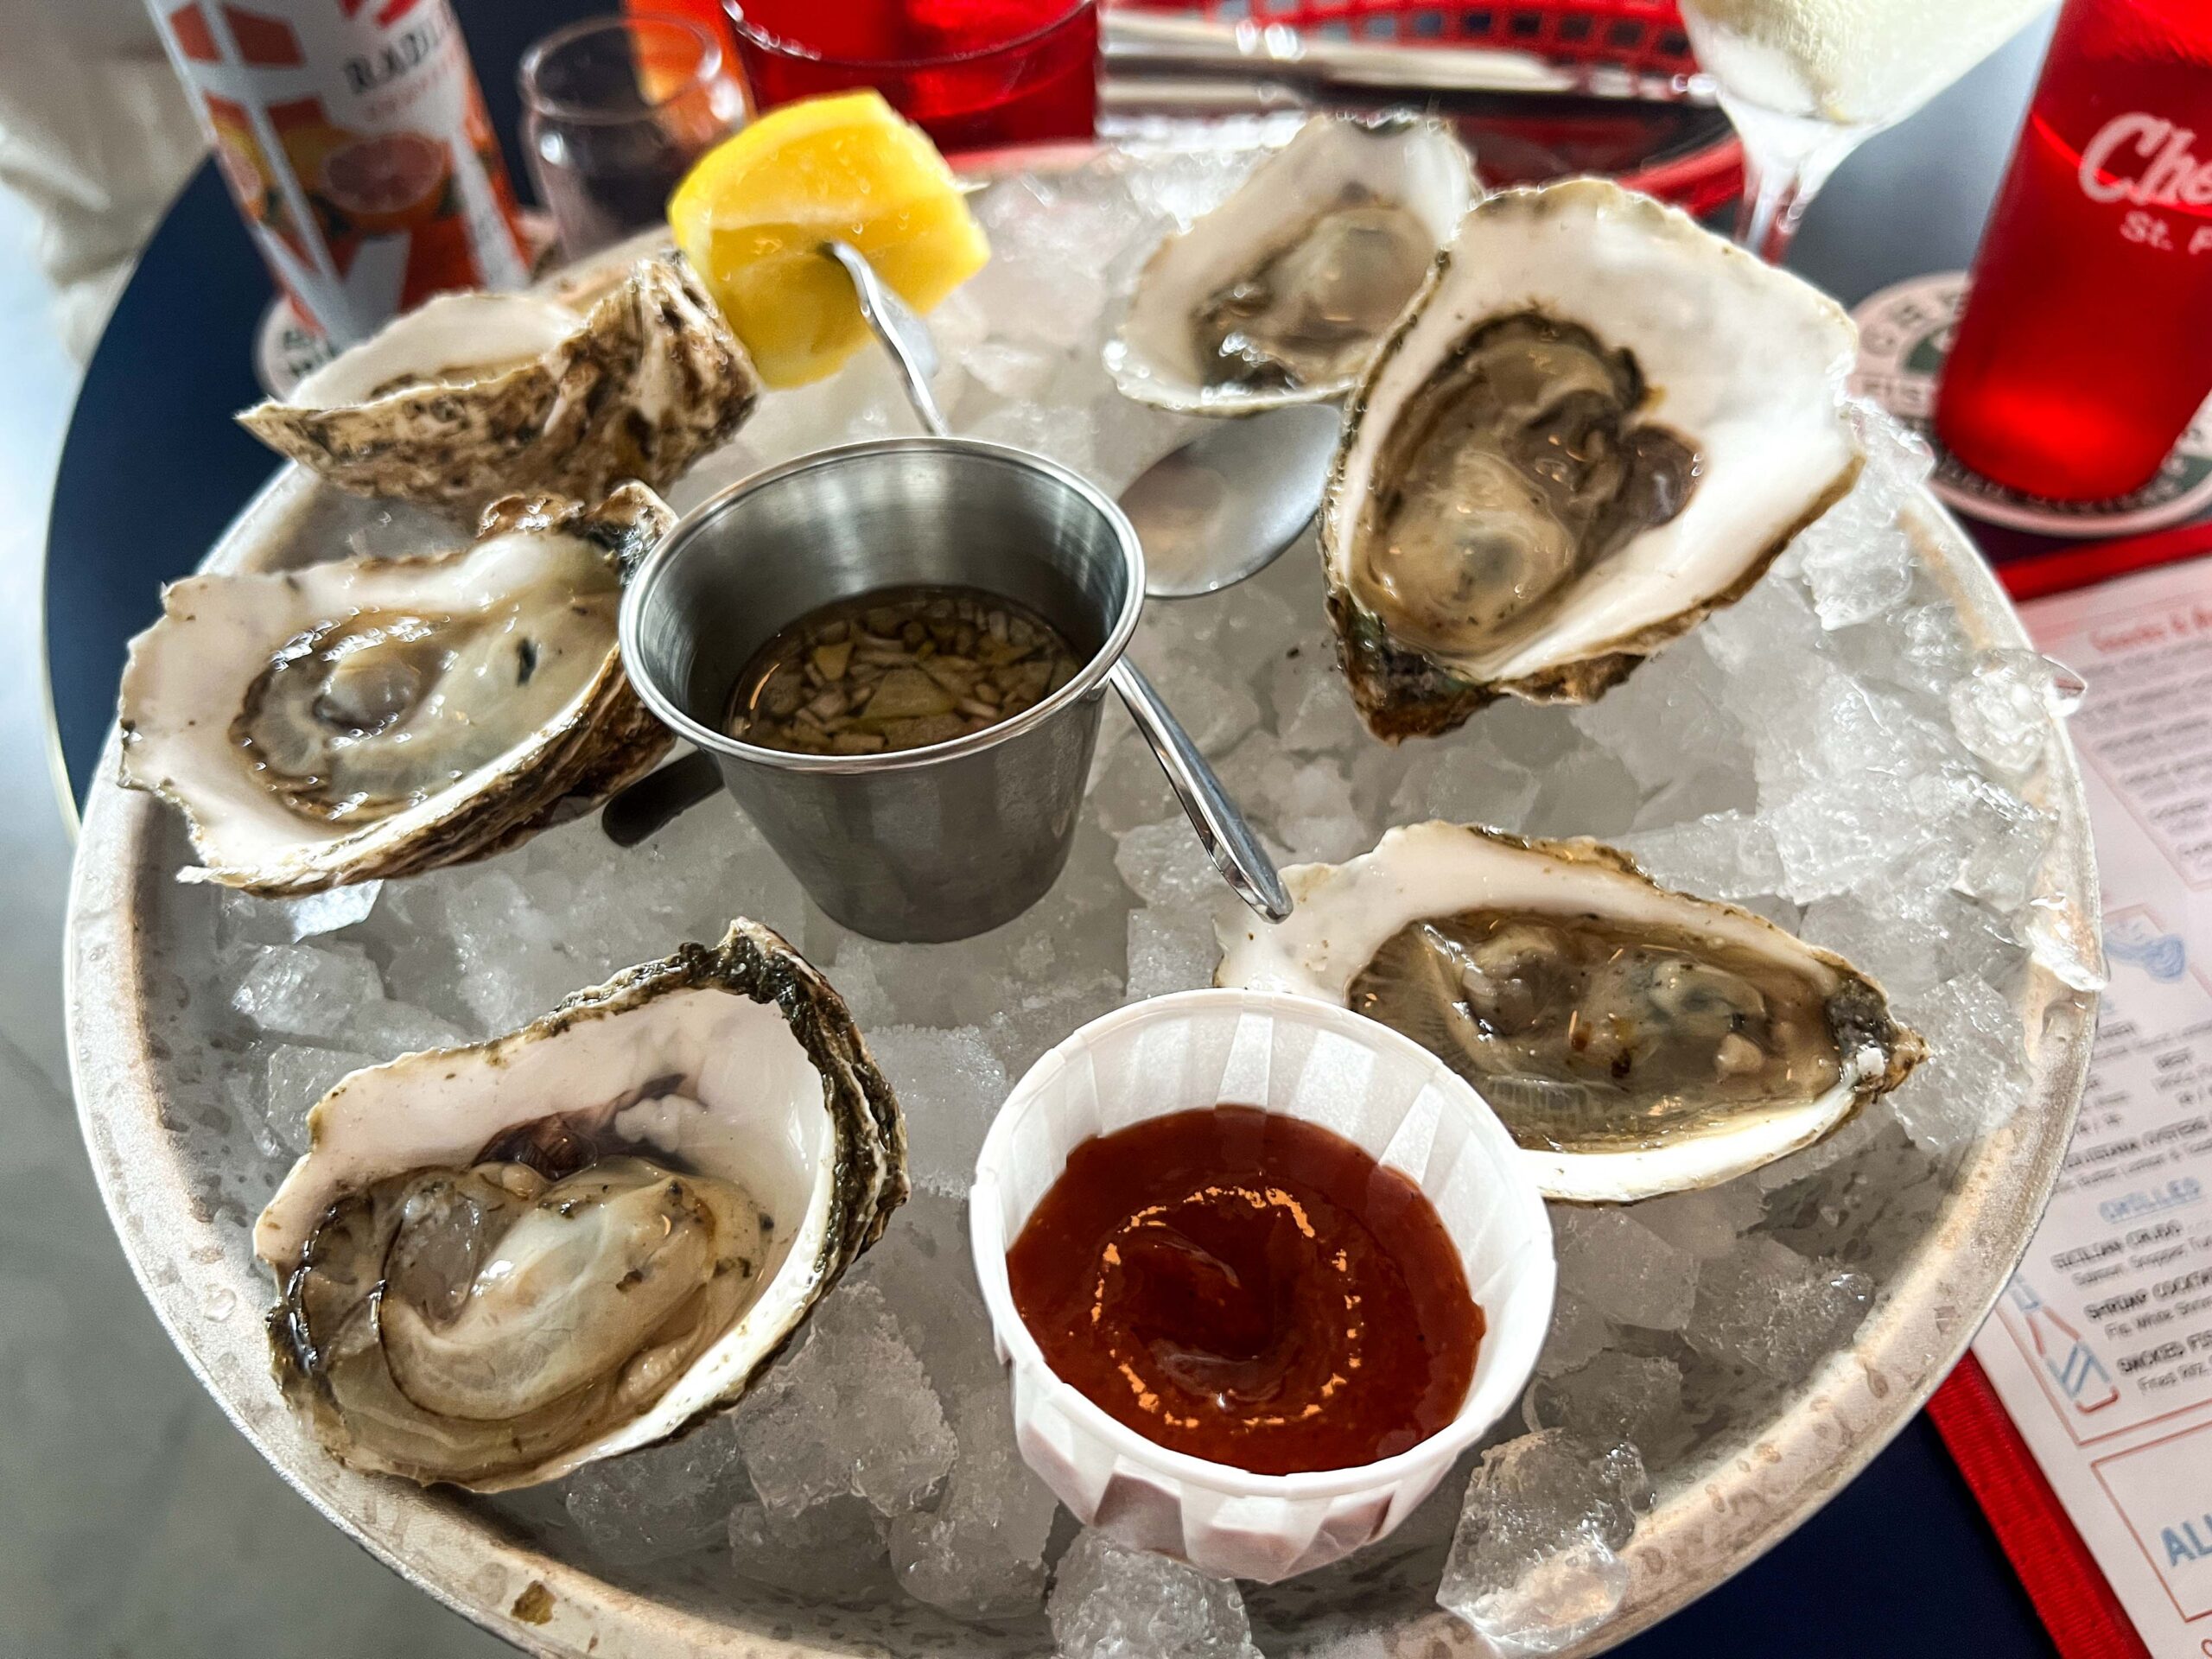
Cheeky’s, one of the most recent restaurant additions to the Grand Central District of St. Pete, is creating a splash with its fresh and playful take on seafood and familiar raw bar delights. From an array of oyster varietals and inventive crudos, to familiar seafood classics, Cheeky’s celebrates the bountiful waters of Florida and the east coast. With its laid-back coastal vibe, ice cold drinks and friendly service, Cheeky’s is already becoming a lively hotspot. Cheeky’s radiates the charm of classic oyster bars and coastal fish shacks with walls adorned with an extensive collection of nautical memorabilia. A horseshoe bar, with about 20 seats in the middle of Cheeky’s, is the focal point in the space. There are also several banquettes and tables situated throughout the restaurant. While they do not have air conditioning, which was intentional, they do have 20 fans and two swamp coolers. I found that these kept the air flowing and the temperature comfortable during our dinner on a warm Saturday evening. The goal was to achieve an open-air space with a gentle breeze that exudes the allure of a seaside establishment…and in my opinion, they nailed it. Tampa native Nate Siegel is the man responsible for bringing Cheeky’s to life. You may already recognize Nate from his success with Tampa favorites Willa’s and Willa’s Provisions. Upon entering Cheeky’s during our visit, it was great to see Nate there at the front eagerly greeting and chatting with guests. For now, Cheeky’s is only open for dinner service Wednesday through Sunday, but brunch and lunch are in the works for the near future. Happy hour launches on Wednesday, June 4th and will be offered every day that Cheeky’s is open from 3:00PM – 6:00PM. Reservations are available through Resy, but the restaurant is walk-in friendly and they will do their best to accommodate your party. We had a reservation at 6:00PM and were seated promptly after checking in at the host stand. Throughout our whole meal, the bar remained mostly full and there was a very steady flow of traffic into the restaurant of solo diners and couples, to families and groups out for a good time. If you have little ones, Cheeky’s is very family/child friendly – we noted plenty of kids. Our table at Cheeky’s was located between the entrance and the bar, so we had a front row seat to all of the hustle and bustle. Nicholas, who took fantastic care of us during our meal, greeted our table and collected our drink orders. Cheeky’s drink menu is very fun and approachable. Sections include: ice cold martinis, cocktails on tap, frozen drinks, mocktails, party starters, beer and wine and more. It’s no surprise that my eyes immediately went to the martini section where I landed on the Salt & Vinegar Martini with Ford’s Gin (Grey Goose Vodka is also an option) and an olive-wrapped anchovy (it’s actually an anchovy-wrapped olive). The sword cocktail pick was both an amusing and nostalgic touch. This drink is spirit-forward and savory with a touch of acidity – this was a delight. My husband couldn’t resist the Stiff Stiegl under the party starter section. A Stiegl is a grapefruit beer and it is served alongside a mini negroni. You can enjoy the two drinks separately or you can combine the two in the glass that is provided with this drink (which is what my husband did). The combination of the two drinks makes for a refreshing and enjoyable concoction. I brought my mom along for dinner as well and she couldn’t resist a refreshing cocktail from the frozen section. There are four different offerings in this section: Nana Daiq (banana daiquiri with rum, banana and lime), Espresso Martini, Margarita and a Transfusion. Nicholas explained that the Nana Daiq wouldn’t be on the menu much longer as the cocktail in that spot will rotate regularly. At first glance, one would assume that this drink would lean quite sweet, but it was well balanced, easy to drink and a great beverage on a balmy day. We ran over the menu with Nicholas and he made a few suggestions which caused us to deviate from our original ordering plan. Spoiler alert – we were ultimately very happy with our selections. A total of six dishes hit our table and we ordered two items at a time. Oysters were a nonnegotiable, as Cheeky’s offers a great selection of three different types and price points of raw oysters available in half or a full dozen. The oysters are listed as Good (Blue Point, Conn.), Better (Katama, Mass) and Best (IROCs, Fla). Additionally, they also have Char-grilled Louisiana Oysters (a total of six). We selected a half dozen of the “Better” oysters. Cheeky’s oysters are served with lemon, cucumber apple mignonette and cocktail sauce. These oysters, from Katama, Mass, were medium-ish in size and had a sweet and creamy bite to them. With the oysters, we also couldn’t resist ordering the Old Bay Pimento Cheese with apples and fried Ritz crackers from the snacks and apps section. We have had other renditions of fried crackers and dips before and we were very keen on this little trio. The apples were an unexpected, yet welcomed vessel for this cheese spread as cheddar cheese and apples are often paired together in various recipes. The Cornbread Hushpuppies with Honey Butter and Guava Jelly were one of the suggestions by Nicholas. Crisp exterior, warm and fluffy interior and the honey butter and guava jelly are what made them irresistible. Initially, the Shrimp Cocktail (six total white shrimp with cocktail sauce and lemon) were a part of our starting lineup, but Nicholas mentioned that the Garlic Butter Shrimp was a new addition (and one of his favorites on the menu), so, we followed his lead. The dish is shrimp seared in lemon, herbs and spices and served with grilled bread. Yet, another crowd pleaser. The shrimp were tender, cooked well and the combination of flavors was harmonious. Make sure […]
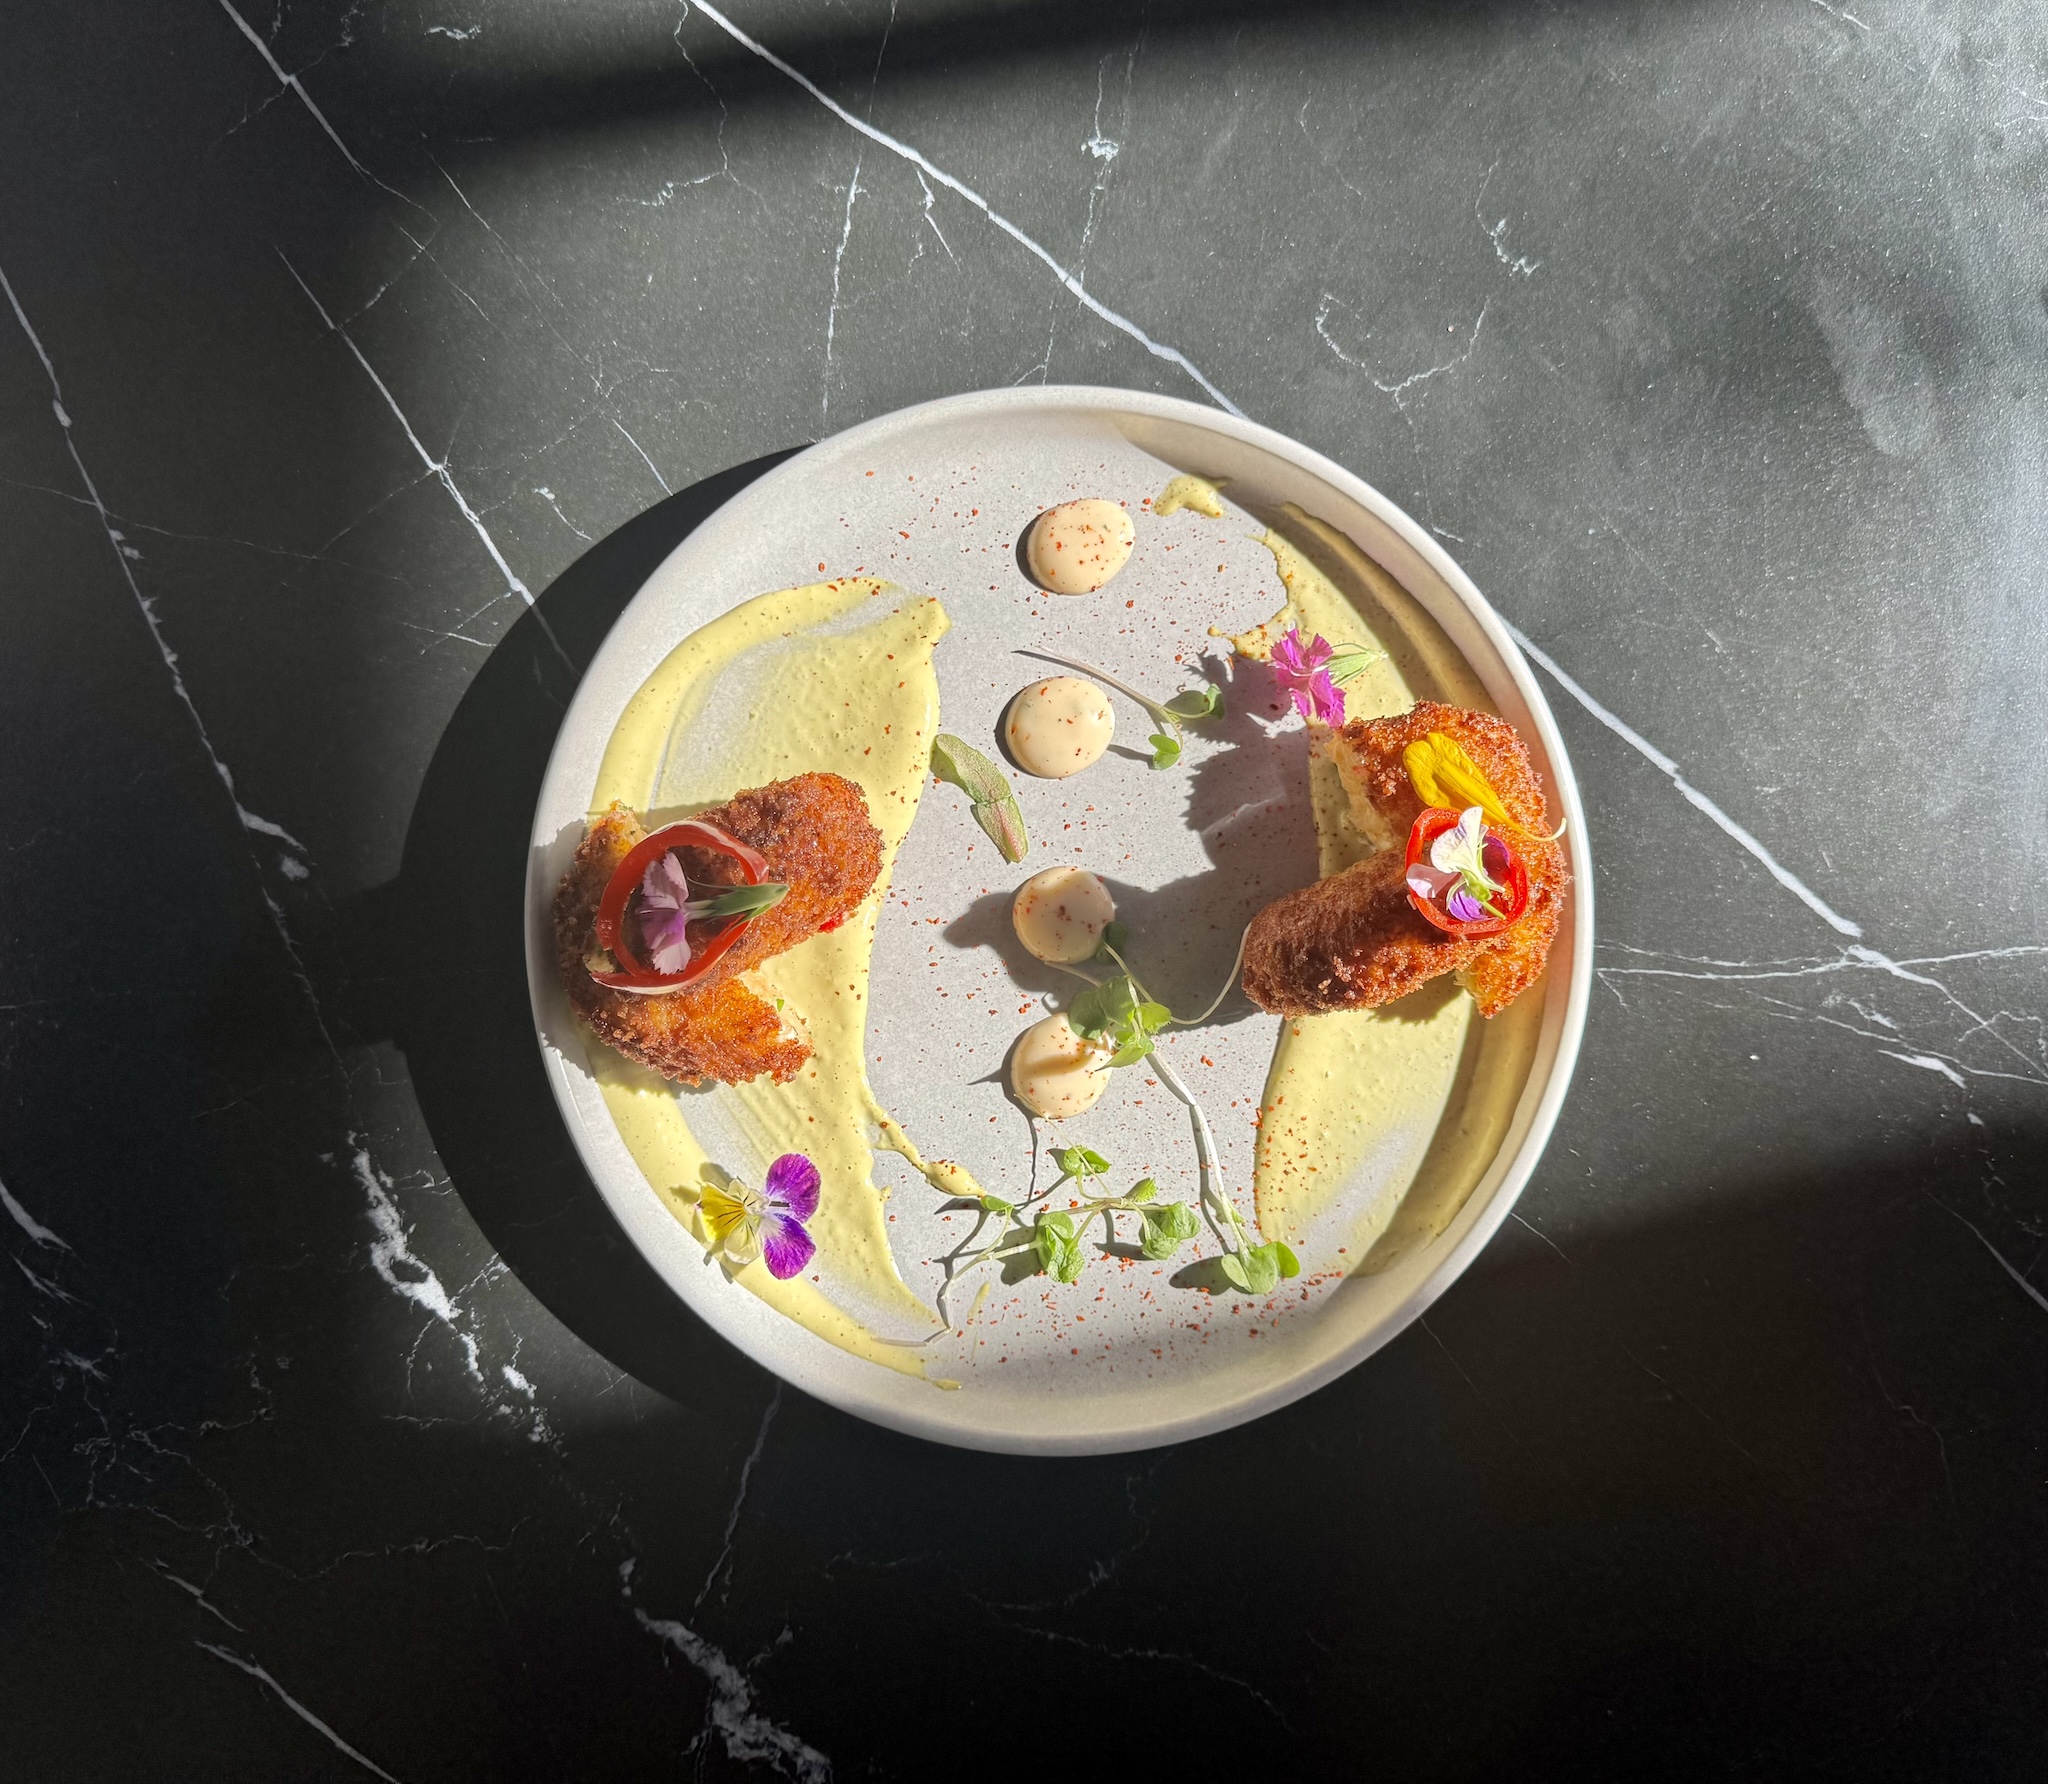
Perry’s Porch, one of the newest additions to the St Pete food scene, opened in mid-February to a splash. Since it’s opening, it’s been hard to get a highly coveted seat. It is highly recommended to have a reservation. Perry’s Porch is brought to you by the team that owns Mandarin Hide, Trophy Fish and they recently bought El Cap to preserve its legacy. The restaurant is an homage to C. Perry Snell, a pioneer in creating many familiar spaces in St Petersburg in the 1920’s. He first built the historic Snell Arcade building (completed in 1925) and then moved on to develop his dream land masterpiece, Snell Isle. It is said that he used Snell Arcade as collateral to develop Snell Isle, and then due to the crash in the 1920’s he lost everything. He literally gave everything to start the St. Petersburg we know and love today. Please note: Every single dish is stunning, so I don’t say this in all descriptions. But wow. ALL MENUS ARE PICTURED AT THE END OF THE REVIEW. Our server on my second visit, Kayla, told us that the restaurant was intended to be somewhat of a replica of Snell’s home. His home had a three sided wrap around porch, hence the name. As you first walk up you will see a large bar to the left and table seating on the right. When you first enter the small indoor dining room the cafe greets you on your left. The cafe opens at 7am and offers coffee and espresso, iced coffee, herbal tea and bakery items. As you turn to the left you move through the inside dining space that features an inside bar on your right and tables that will seat about 25 patrons. A reservation is a must for indoor seating. Our table was next to a wall of paintings, the center, I was told, is a portrait of C. Perry Snell himself. As you walk through this indoor area, you take a right and land on a gorgeous, expansive patio with many tables adorned with lovely umbrellas for shade. After all we do hold the nickname – The Sunshine City. On my first visit to Perry’s Porch, I met my friend Erica for lunch. We did not have a reservation and were told there were no tables available. Luckily, the outside bar did have some availability and we were able to sit there. We ordered as one would at any other restaurant; our appetizer and our entrees at the same time. It didn’t even cross my mind to ask to have them spaced out. Unfortunately our entrees came and our appetizer right after that. We were not told that this could happen. This is one of my biggest pet peeves but we made the best of it. We ate the appetizer first which was the Crispy Artichokes with grana padano, roasted garlic & lemon aioli. They were zingy and pleasant tasting but I didn’t really find them crispy. Erica ordered the Burrata (salad) which is a salad consisting of melon & beets, basil oil, burrata & greens and served with crostini. I only took a bite of the beets, but Erica seemed to enjoy it. We both agreed it could have been seasoned better. My main dish was the Chicken Francaise’ with lemon, garlic, fresh herbs & bucatini. I was really excited about this dish because I love a good lemon sauce with chicken. The flavor was fantastic, and it was seasoned well, unfortunately, because everything came out all at once, when I went to eat this the chicken batter was mushy. It just didn’t hold up well to waiting to eat it. I will definitely try this one again because the flavor was terrific. If you like your food spaced and timed out per course, I would highly recommend letting your server know in advance. Kevin and I went back this past Saturday, April 5th. We had a reservation for a table inside at 5:00. The place was jamming. Our five star excellent server, Kayla, greeted us with excitement about the restaurant and the food. She is the one that told us the story about the restaurant mirroring Snell’s original St Pete home. Because of my last experience here, I explained that we would really like one dish at a time so that we could take pictures and really enjoy each as they came. She was excellent at making that happen. Much to my surprise at the end of our meal, I asked if she had been with the restaurant since day one, only to find out it was only her second night on the floor. We started with drinks. I had the Green Devil with whisky, elderflower, cantaloupe, ginger, cucumber, lime & mint from their cocktail list. Seeing as this is the same team behind The Mandarin Hide, I was expecting great and this drink delivers. It is not overly sweet, is very balanced and refreshing. Kevin had the Strauberry Park which is served in a small bowl and contains gin, olive oil, basil, strawberry, white balsamic, sugar, lemon, bitters, salt & pepper. It is quite the sight to behold. Kevin said it had just the right amount of strawberry flavor that melded with a bit of acidity, peppery and floral notes. He loved the pepper. I asked for salt and pepper and thought this pepper mill was a great, nostalgic touch. Our first appetizer, the Tuna Crudo with grapefruit, capers, ponzu & lemon oil, was good but not great. The lotus root chips were what they seem to be counting on to give that touch of salt that this dish so desperately needs, however, there were not enough of them to go with the amount of tuna on the plate. The lotus root was the star of this dish. We just found the tuna crudo lacking in flavor. Kevin suggested that if they want to keep the integrity of the plating, which is beautiful, that […]
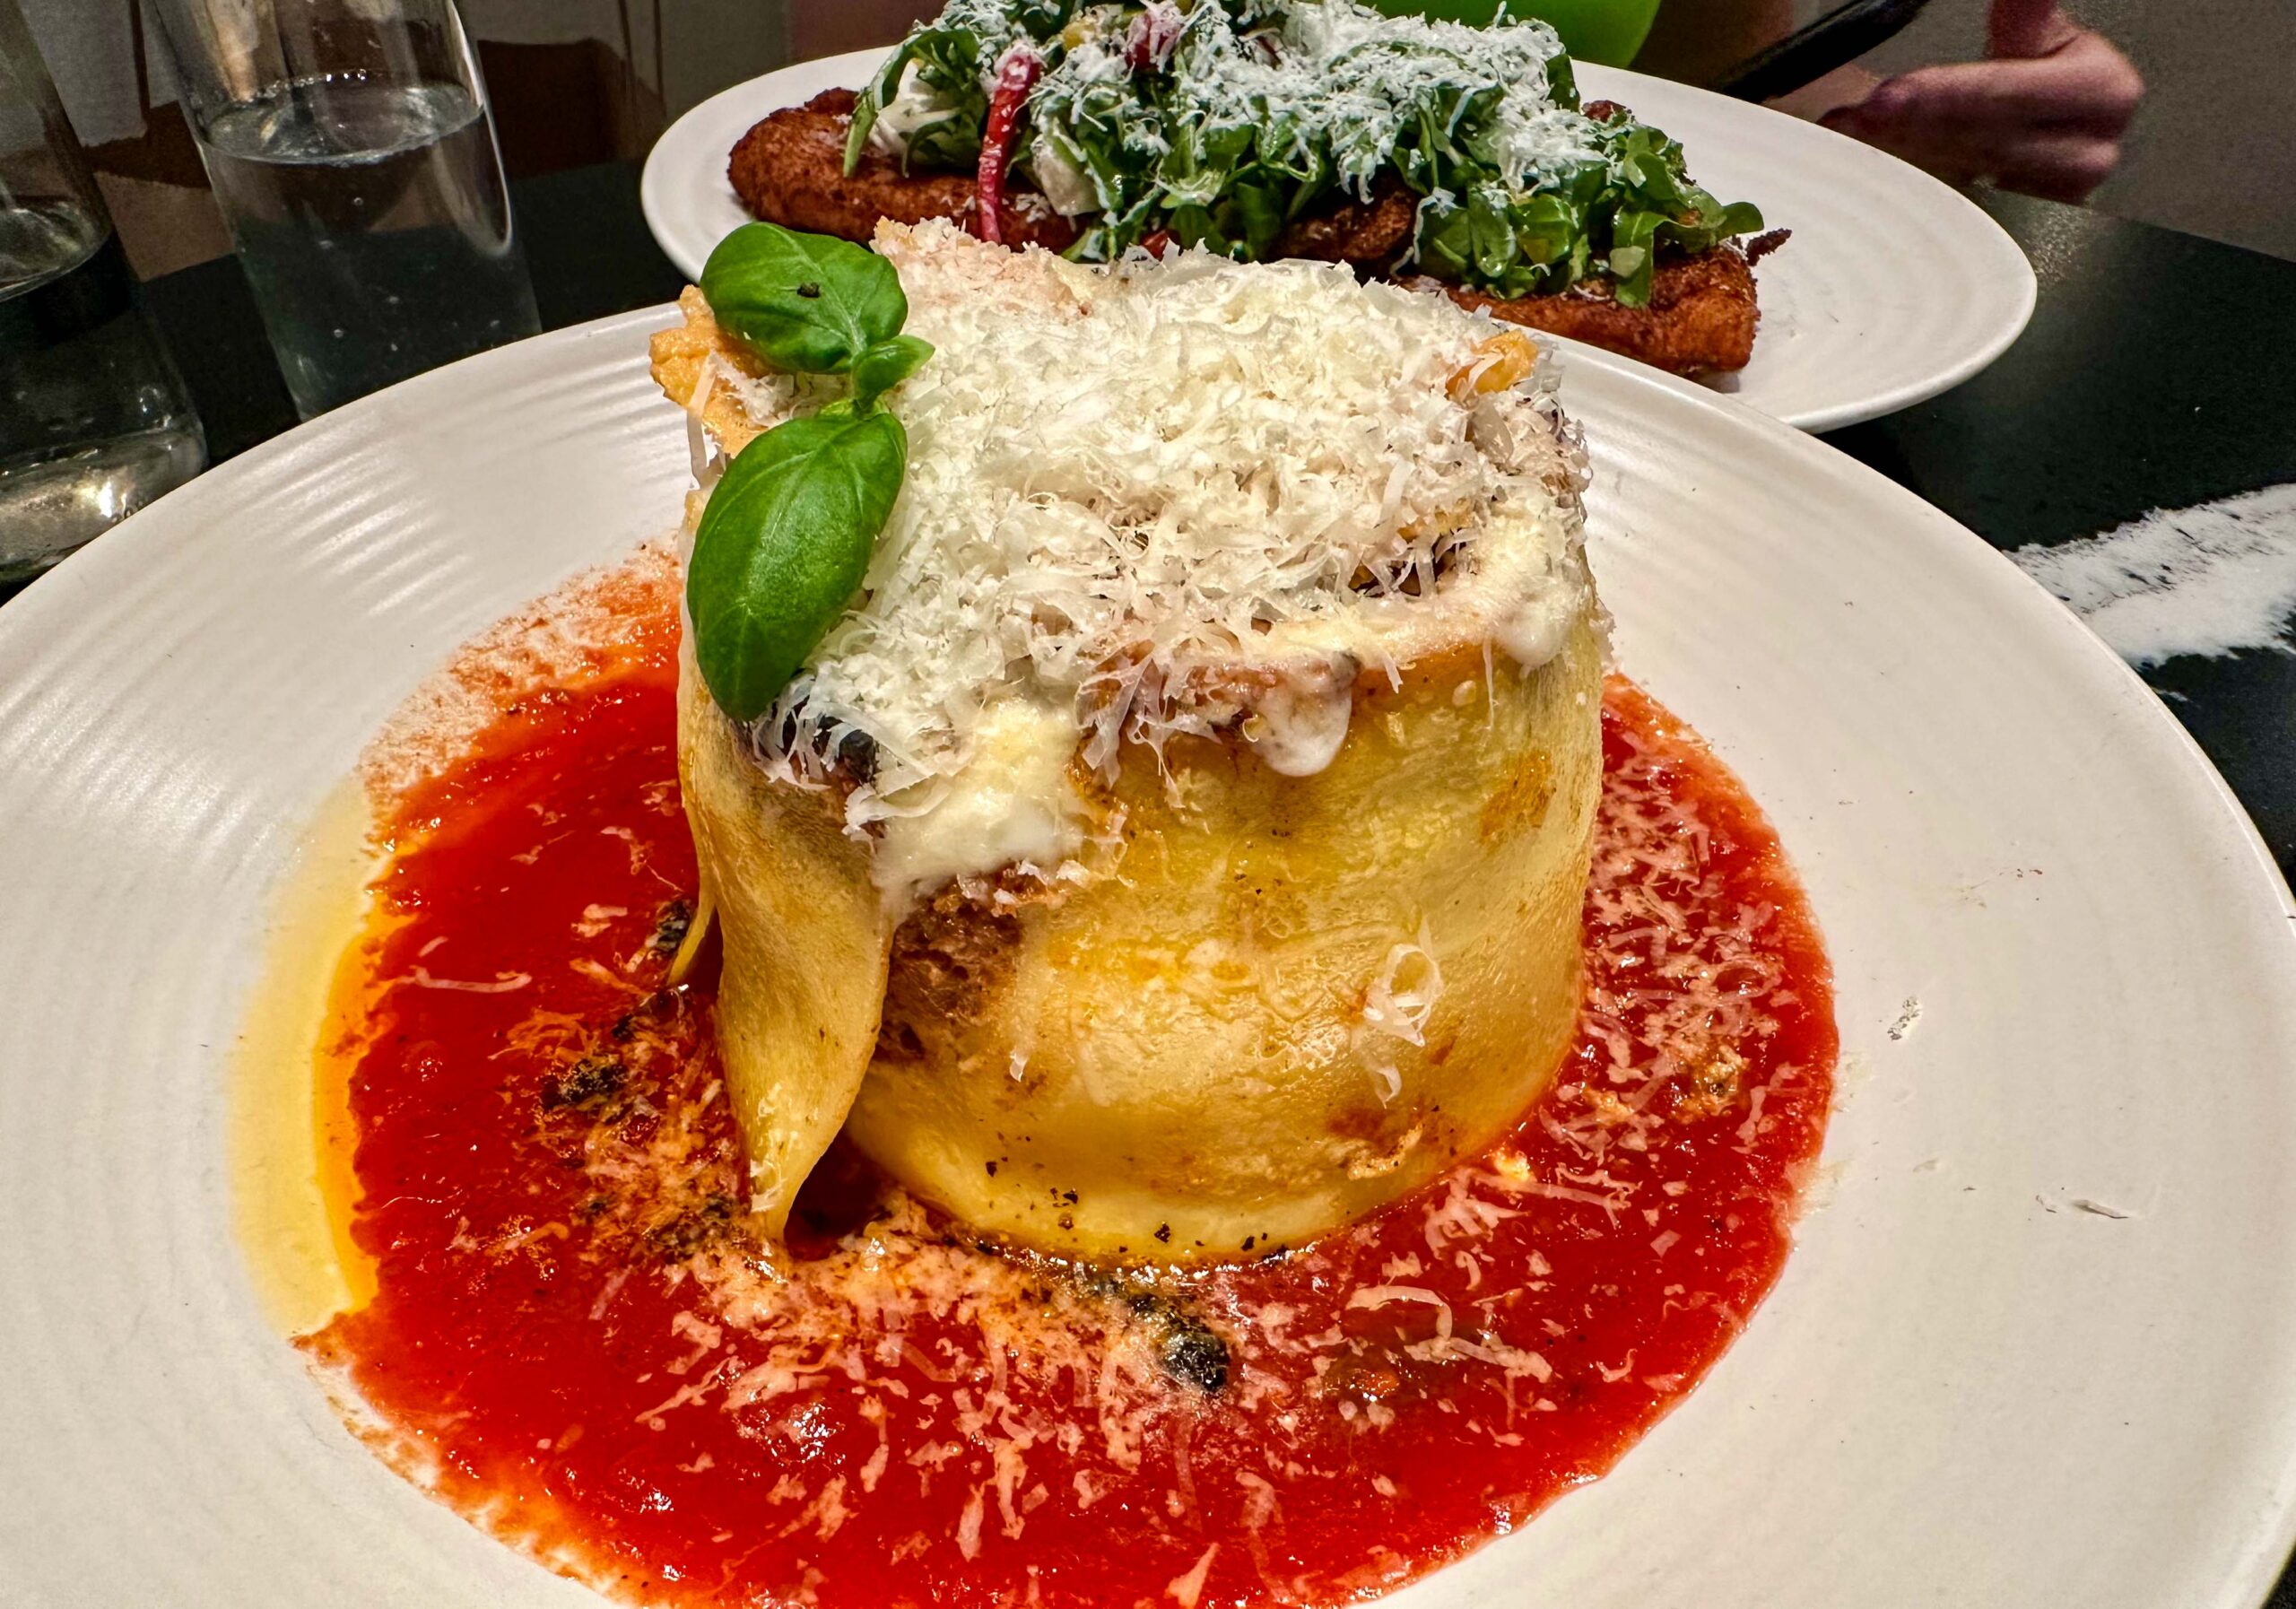
Since its debut just over two months ago, Olivia, a modern Italian restaurant by chef Chris Ponte, has quickly become a local sensation. This restaurant is Olivia’s second location. The original Olivia on Swann Ave. in Tampa has upheld an outstanding reputation for over five years now. Olivia, named after Ponte’s daughter, is located on the ground floor of Ascent’s 36 story apartment and hotel tower at the corner of 1st Ave N. and 2nd St. right in the heart of downtown St. Petersburg. Valet parking is available off of 2nd St. N. Street parking is available in the surrounding area, if you are fortunate enough to find a spot. There are two parking garages available, as well, within a couple of blocks. The restaurant boasts a spacious and open layout with seating for up to 140 guests inside. Outside, another 40 seats are available. Tables within the dining room can be reserved through Resy, while the patio and bar seats are available on a first-come, first-served basis. We dined at Olivia at 6:00PM on a Friday night and the dining room was full and the wait list to dine at the bar was already stacking up. The space features carefully curated design elements with modern accents that create a stylish ambiance. As you enter through the front door, the first area to grab your attention is the working dough room where all of the pasta dough and fresh mozzarella are crafted. This can be observed during service. Sleek art and large mirrors adorn the walls of the restaurant. The mirrors give off the illusion that the dining room is even larger than it actually is – this is an interior effect that I admire. We were seated promptly upon arrival at a two top table with banquette seating on one side and a large armchair on the other. In addition to the standard dinner menu on the table, there was also a tablet with a wine list. Some may not like this format for choosing a wine, but I can assume that it probably makes the process a bit more simplistic. The regular menu has cocktails and wines by the glass on one side and the dinner menu located on the other. One important detail on the menu to pay attention to is the paragraph about the 15% service charge that will automatically be included on the final bill. This is not a straight gratuity that goes only to your server. It is distributed to staff throughout the restaurant. The cuisine at Olivia is deemed as modern Italian with dishes that range from antipasto plates and pastas to intriguing pizzas and an array of secondi options. The cocktail menu has a healthy mix of familiar and inventive libations. To start, I decided on the Bianco Negroni with Sipsmith lemon gin, Italicus and Lillet blanc. This cocktail was very well-balanced and smooth. My husband Mike was a bit more adventurous with his drink selection and ordered the Serenata. A very unique list of ingredients make up this drink: clarified sauvignon blanc, Papas Pilar, lime cordial, saffron liqueur, Galliano and pineapple. I would describe this as a pineapple-forward tiki drink with a soft texture due to clarification. After the first drink, I switched over to wine with a super tuscan from the by the glass section. Mike continued through the cocktail list and decided that the ‘O’ Fashion would be his final drink. Old Grand Dad, Foro amaro, Faretti biscotti and Nocello make up this play on an old fashion. Chocolate notes are very prominent here, but welcomed, and the drink is garnished with a dark chocolate stick. Because we knew that we would be ordering a large number of dishes, we decided to order two items at a time. We began our journey through Olivia’s menu with the garlic bread and meatballs. The garlic bread presentation was very unique and turned out to be the initial selling point. Before deciding on it, we watched a few orders float through the dining room. Slices of a half loaf of bread are lightly toasted and topped with salmoriglio (a flavorful southern Italian condiment typically made with olive oil, lemon juice, garlic, parsley, oregano and salt) and parmesan cheese. Each slice is meticulously stacked and the tower of delectable bread is secured with a toothpick. We were informed ahead of time from a few different sources that the meatballs shouldn’t be overlooked. Three ultra-tender meatballs are served in a shallow pool of pomodoro and topped with fontina fonduta foam and basil. A toasted slice of bread also accompanies the meatballs. Because we had the garlic bread, we didn’t need the extra slice. I recommend ordering these two items together as the garlic bread dipped in the pomodoro makes for a very enjoyable bite. Like the meatballs, the Tuscan Kale salad was also a suggested plate. This colorful salad’s lineup includes salami, peppers, mozzarella, olives, onion, cucumber, green beans and crispy chickpeas. The second dish ordered with the salad was the Coccoli Fritto. The name refers to smaller pieces of bread that are fried. Olivia’s rendition is presented with prosciutto, stracchino (a soft cheese), fig jam and truffle honey. The bread was just a touch more chewy than we would have liked and I didn’t find the truffle honey to be necessary, but overall, it’s a crowd-pleasing appetizer. Ordering a pasta dish was a non-negotiable. Deciding on a dish proved to be very difficult as all of the pastas listed sound enticing. I had heard whispers of possible off-menu lasagna prior to our visit to Olivia so inquiring about this was on the forefront of my mind. The lasagna was confirmed as a special that they have been running (with no end in sight – this could land a spot on the menu some day) so we decided to give it a go. Moments after ordering, no less than three orders of this impressive dish were carefully escorted to other tables around us […]
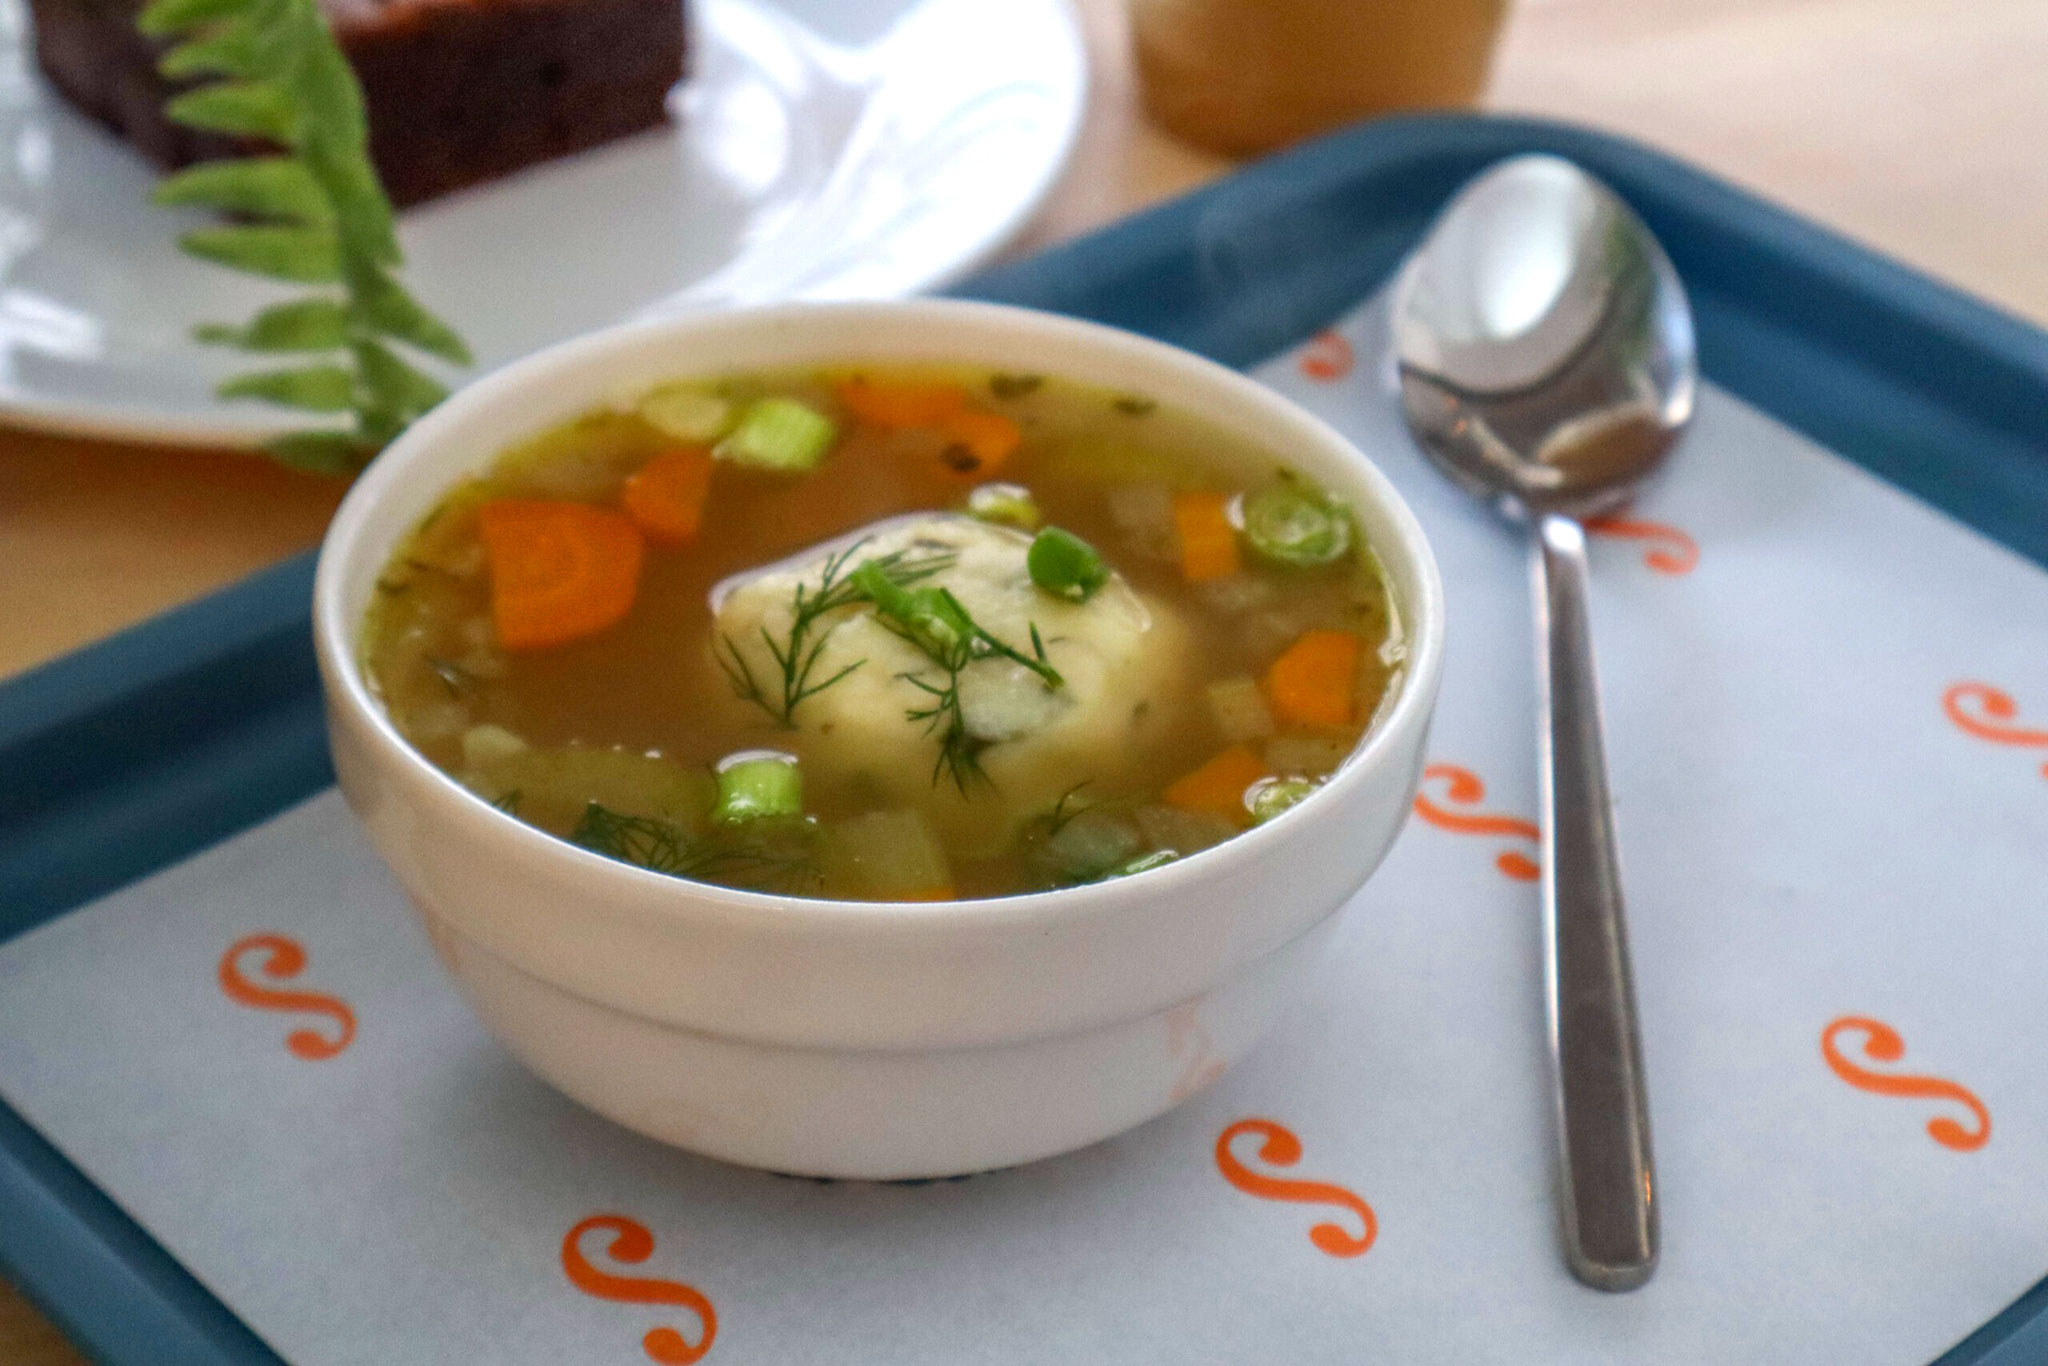
If you live in St. Petersburg and enjoy a good bite, chances are, you’ve heard of Pete’s Bagels. Steven Peterman’s desire to bring a NYC bagel to St. Petersburg manifested itself in the first Pete’s Bagels store in historic uptown in 2019. Since then, they’ve added locations across St. Pete (the famous bagel-sandwich-stop and general store with all things Florida in the Grand Central District), Gulfport (a production bakery) and Ybor (a charming storefront for bagels and pastries). Even with their impressive expansion, Steven and his friend Erica Gonzales are both lovely people with a certain humility that screams, I literally just want to make bagels. I’ve spoken to both at length for different stories, including when I covered the opening of their co-working space in Gulfport, the Monday Morning Club. In February, Steven debuted his latest venture: a casual lunch spot inspired by and named after his grandfather, Seymour. While bagels still feature heavily on the menu, Seymour’s is more of a casual lunch spot. They’ve got bagel sandwiches, matzo ball soup, quiche and biscuits, and a full coffee lineup. I visited Seymour’s twice – once during their soft opening period, and then just a few days ago. During my first visit, I knew I had to try the tomato melt. While I don’t have confirmation of this, I’m sure it’s a popular item because it’s something that isn’t on the menu at the other Pete’s Bagels stores. I really enjoyed the tomato melt; it features garden herb cream cheese, two thick slices of heirloom tomato, banana peppers and white cheddar, all toasted open-faced. The cheese was indeed “melt”-y, and the freshness of the tomato cut through all of the creaminess well. However, I will say it gets a bit messy and soggy quickly. It’s definitely best fresh, and I personally think a generous squeeze of lemon/lime would further elevate it by delivering some tanginess. I do think $12 is too steep for this, though. I would highly recommend choosing a jalapeño cheddar bagel, but then again, that’s my favorite bagel of all time and I’m very biased towards it. One thing I was absolutely delighted to see is that their coffee partner is Look Alive – a family-owned roaster that opened about a year ago. I jokingly call owners Michael and Kelly Packard my “coffee parents,” because they are the kindest people and my go-to for all my specialty coffee needs in the city. I’ve been to the roasters on 1st Ave S multiple times, and have enjoyed every bag of beans I’ve bought from them. During one of my interviews with Steven, I learnt that he and Kelly are actually friends from college. It’s very heartwarming to see how they support each other’s businesses, and it’s honestly for good reason because Look Alive is absolute quality. Here’s everything I tried from Seymour’s espresso bar: A cortado during my first visit, which, to my delight, was a true cortado (equal amounts of espresso and milk). A cappuccino, which was good and did have the classic thick layer of foamy milk, but I do wish they used standard coffee sizes and cups since they are using specialty coffee. The regular size for a cappuccino is 6 oz and a latte is 8 oz; these are internationally standardized sizes and something that you should look for at specialty coffee shops. It’s not a big deal, though, because Seymour’s is definitely a more casual spot and doesn’t claim to be a specialty coffee place. An iced latte which was absolutely delicious. You know when you order your iced latte and know you’re in for a rough cup just by looking at the color, often almost white and overly milky? That was NOT the case this time around. My friend Lilly and I ordered a vanilla iced latte and honey iced latte, respectively, and these 16oz drinks were absolutely perfect. Smooth, strong espresso, a nice dark brown color and not overly sweet. If you visit and Aidan is working, definitely order an iced latte. He understands the assignment. Lilly, who is somewhat of a chicken salad enthusiast, and I shared a chicken salad bagel sandwich. She loved it, so that’s saying something. It was indeed a solid sandwich, with lots of herby flavor, not too much mayo, and the wonderful roasted nuttiness of an everything bagel. Like at all of the Pete’s Bagels locations, you can choose which bagel you want when you order a sandwich. But, take it from me, everything or jalapeño cheddar is always the answer. And of course, the star of the show, the matzo ball soup. This was the first matzo ball soup I’d ever had, and the matzo ball was delectable. It held its shape but was so soft, well seasoned and I immediately noticed the generous amount of lemon zest in it. The clear soup was so comforting, and all around, I would say this $7.50 bowl is the highlight. As of now, the matzo ball soup is only available after 10am. Pete’s is known to have a great pastry selection, but somehow, over all my visits to the Grand Central location, I’d never tried their sweet treats. I thoroughly enjoyed the slice of orange olive oil cake I had, it was incredibly moist and syrupy, clearly soaked with that orange flavor. Aidan, our awesome server, gave Lilly and I a brownie on the house since we came back twice in one day. Now I have incredibly high standards for brownies, and this one was just incredible. It was very dense and fudgy, clearly featuring high quality chocolate, but what stood out most was that there was quite a bit of salt in the batter itself. It cut through the richness so well, and I’d definitely recommend trying this. Beyond the food, the staff and ambience are also lovely. Seymour’s has quite a large storefront, with ample window-side seating (and multiple outlets available) and a whole additional room in the back. With Look Alive’s […]
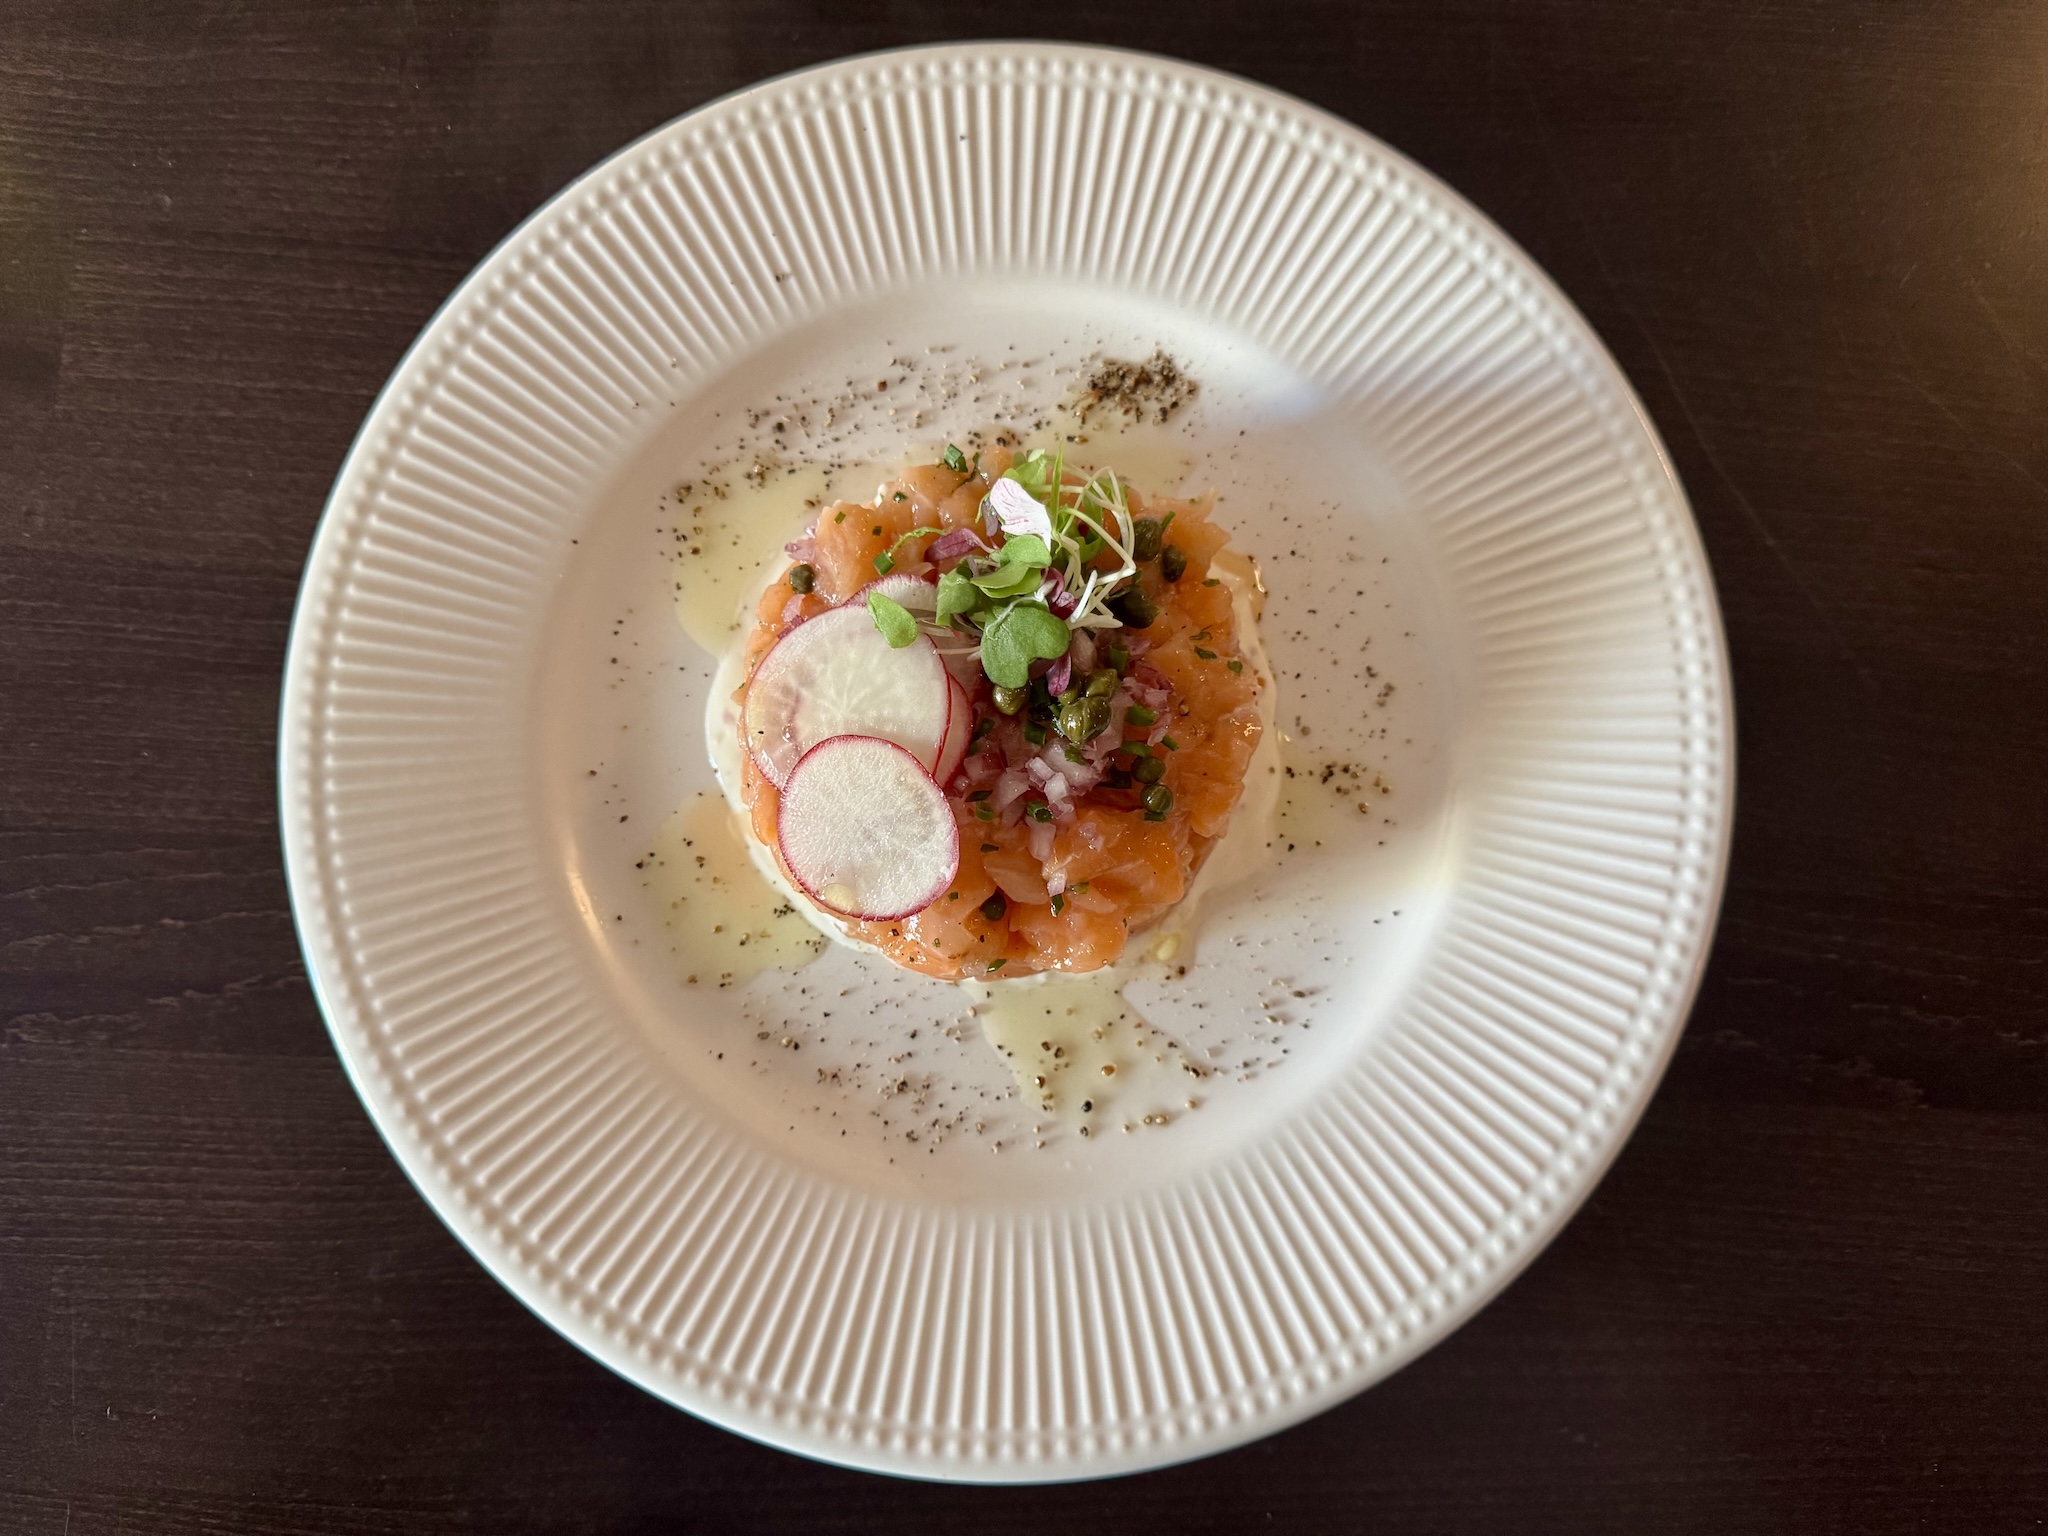
Last week, we visited one of the newer restaurants in town. Cognac, which describes itself as a relaxed Parisian style bistro, opened its doors on February 5th. They are in the space formerly occupied by most recently, Dirty Shirley, and prior to that 2nd & Second diner. Cognac offers both indoor and outdoor seating. Enjoy a tantalizing culinary journey to France without the jet lag. We fully enjoyed the Parisian ambiance, as you can see from the pictures below. Christophe said that they reworked the room on the left side of the bistro to be able to hold larger parties, which is an important part of their business model. So if you’re looking to hold a party or just a place that can accommodate 10, 15 or 20 in a party, Cognac has you covered. Cognac has a full liquor bar with creative craft cocktails, traditional cocktails, beer and a splendid selection of wine and, of course, bubbles by the glass, carafe and bottle. We started with a glass of Telmont Reserve Brut Champagne which was bright, crisp and bubbly. I find some champagne to be too yeasty, this one was not too yeasty or too sweet. It was balanced quite nicely. The kitchen at Cognac is choreographed by Executive Chef Louis DeBiase. He is also an important part of the success of their first restaurant, Bacchus Wine Bistro. And now to the food…we sampled quite a few hors d’oeuvres in order to get a great tasting overview. Kevin absolutely had to have the Soup au Fromage – creamy red pepper and gouda. I am so glad that he insisted. The soup was just pure comfort in a bowl. Think, an elegant tomato bisque served with buttery, toasted baguette slices for dipping. We had a hard time not finishing it all, but had to resist, because we had a lot more to go. Next up, Escargot de Bourgogne – baked escargot and parsley butter served with a bowl of the sliced baguette. You can’t go to a French bistro without ordering the escargot. What gets more French than that? We have had escargot many times, but this is the first time I can remember using a snail tong to pick up the shell and pull out the snail from the shell. In fact, I have never seen a snail tong before, most restaurants probably just don’t want to make the investment… *assumption alert*. The snails were perfectly buttery, plump and juicy. From the English Picture Dictionary: “Snail tongs are specialized utensils designed specifically for picking up and eating snails, particularly in dishes like escargot. They typically have long, slender handles with rounded or spoon-like ends, often with ridges or grooves to securely grip the snail shell.” With our bubbles completed, it was time to try a couple of cocktails. I ordered the French 75 which is made with Botanist gin, fresh lime and champagne. Kevin ordered the French Kiss with E11even vodka, Fleur Charmante, Framboise, champagne and raspberries. Both were bubbly and refreshing. Kevin loved the French Kiss. It had sweet and sour earthy tones of blackcurrant, and cherry with just a touch of brighter sweetness of raspberry. I thought mine was just what I wanted – citrusy and refreshing. I absolutely love seared foie gras done right. Kevin loves foie gras torchon (I don’t at all), so this next dish was made for us. We ordered the Duo de Foie Gras which consists of seared foie gras and foie gras torchon, maraschino cherries and more baguette. Andrea, formerly of Cassis and one of our favorite bartenders downtown, surprised us with a sampling of Sauternes wine (a French sweet wine from Bordeaux) to accompany the dish. It is not only a stunningly beautiful presentation, it is actually the only torchon that I actually really liked and that’s saying a lot. The seared foie gras was perfectly executed and melted in my mouth. Just FYI – results from Google AI: “Foie gras torchon, meaning “dish towel” in French, is a style of foie gras preparation where the liver is traditionally wrapped in a towel, rolled, poached, and then chilled, resulting in a cylindrical, ready-to-slice preparation.” Christophe wanted to highlight a few more dishes, so he brought out a few more hors d’oeuvres on the house. First up was Cocktail de Crevettes which, of course, is a classic shrimp cocktail. The shrimp were plump and juicy and the cocktail sauce classically delicious. Next out was the Tartare de Saumon, another incredibly beautiful dish of salmon tartare, crème fraîche, capers and red onion. The salmon was delicious with the capers and crème fraîche, but I wasn’t a huge fan of the chopped red onion. For me, it was too strong for the dish and over powered the soft flavors. Kevin loved it, and most lovers of raw red onion will too. With nearly every appetizer they bring another bowl of baguette. One recommendation I would make to the restaurant is to just bring one and ask if the customer needs more with any other dishes that come out, just to save waste. Now let’s talk happy hour. Cognac has a daily happy hour from 3 – 6pm. They offer $6 selected food and drink specials. Current food specials last week (subject to change) were shrimp cocktail, lamb chop with chimichurri, and cocktail sausage with dijon mustard. Drink specials change daily, so ask when you arrive. Brunch starts today, Friday the 21st of March and will run every day, seven days a week. Brunch, also, includes happy hour from 9am – 12pm which will feature $5 mimosas and bloody Marys and $5 deviled eggs. The reason I brought up happy hour is because the next item Christophe sent out was the happy hour lamb chop with chimichurri. You can see how juicy the chop is from the picture and the seasoning was perfect. It was packed with flavor. As if we weren’t full enough as this point, we couldn’t leave without trying a […]
Recipes
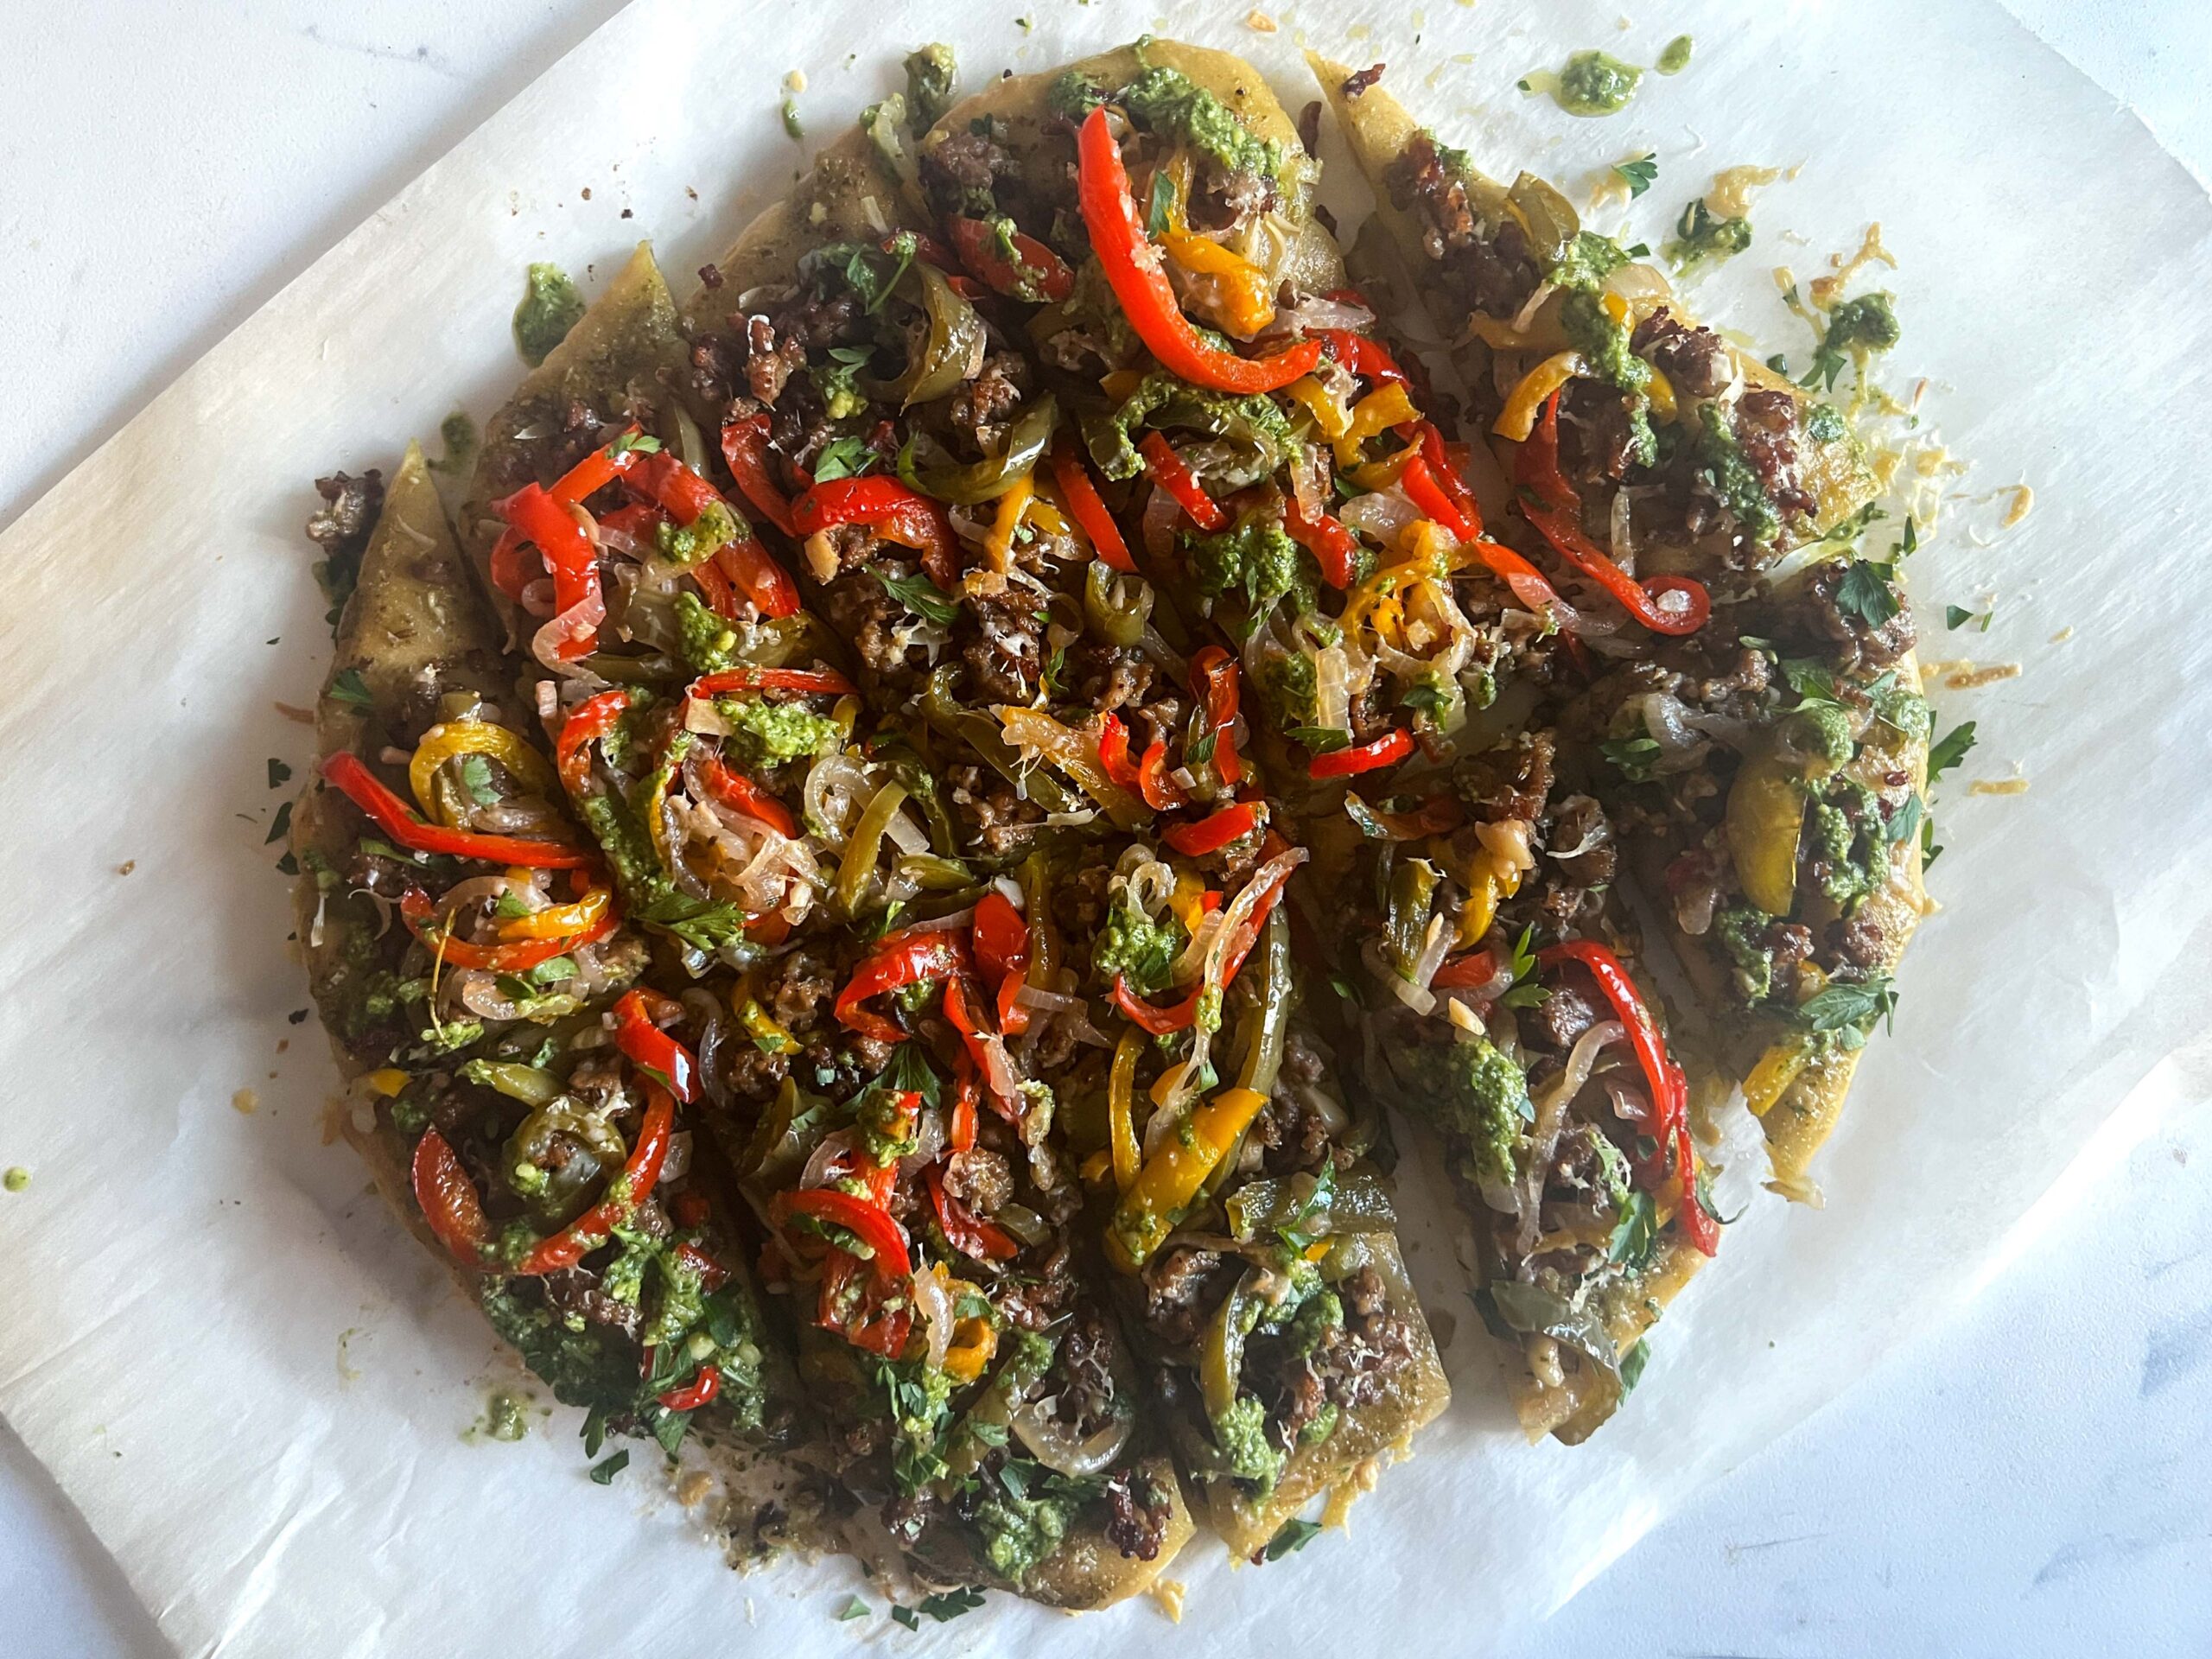
In this recipe, we are transforming simple ingredients into an elevated flatbread that is ideal for enjoying on these cooler December evenings. All of the elements involved in this sausage, pesto & peperonata flatbread are not only complementary together, but they are equally as delicious when used in different applications. The pesto can be tossed with your favorite pasta or served alongside arancini (we actually did this for Thanksgiving this year and it was a hit). Peperonata can serve as an easy appetizer spooned onto crusty slices of bread, or as a tangy topper for sandwiches, crispy cutlets or even with a steak. You can use any type of flatbread for this recipe. On a busy weeknight when time is of the essence, I suggest grabbing a flatbread option that is already baked in the package – naan could even work well here. Rollin’ Oats Natural Food Market sells a few different variations like O’Doughs flatbread, which happens to be gluten free and vegan. If you’d rather bake a homemade or store-bought dough and have the time, I recommend going for it. This way, you can control the thickness of your flatbread. The bake time is only about ten extra minutes, if you opt for this route. The ground Italian sausage brings the the whole flatbread together with its subtle touch of savory spice. Ground Italian sausage is my preference, but if you’d rather a fully-cooked version, you can’t go wrong. Simply slice it into rounds and arrange before baking the flatbread in the oven. Sausage, Pesto & Peperonata Flatbread Recipe In this recipe, sweet and sour peperonata, pesto and sausage are combined to create an elevated take on flatbread. You don't have to make your flatbread dough from scratch in order to get the most out of this recipe – there are plenty of suitable store-bought options available. Pesto5 cups basil (5 packed cups, fresh)3/4 cup parmesan cheese (finely grated)1/2 cup pine nuts3 garlic cloves (peeled and smashed)3/4 cup olive oil1 tsp salt (plus more, to taste)1 tbsp lemon juice (from 1/2 of a small lemon (optional))Peperonata3 bell peppers (about 3 cups, mix of colors of choice, thinly sliced)1/2 cup olive oil1/2 white onion (medium in size, sliced thin)4 garlic cloves (peeled, smashed and sliced very thin)5 sprigs fresh thyme2 1/2 tbsp red wine vinegarsalt (to taste)Flatbread Assembly1 flatbread (homemade or a mix like Bob's Redmill or an already prepared flatbread of choice (naan would work great too))1 lb cooked ground sausage1/2 cup parmesan cheese (grated )basil or parsley (chopped (optional)) PestoHeat your oven to 325F and spread your pine nuts on a parchment lined baking sheet. Toast for 6 minutes. Add pine nuts and all pesto recipe ingredients, except the oil, (including lemon, if using – this will add a touch of brightness) to a food processor or high powered blender. Blend or process on high while slowly streaming in the oil until the pesto is smooth. Add more salt as needed. Set pesto aside until you're ready to assemble the flatbread.PeperonataHeat oil in a large pot or dutch oven over medium heat. Add in peppers, onion, garlic and thyme and cook for 6 minutes. Reduce the heat to medium-low to cook the mixture slowly until peppers and onions soften, about 25 minutes. Discard thyme sprigs, stir in red wine vinegar and season with salt to taste. Set aside.Flatbread AssemblyHeat oven to 400F. If using a homemade or store bought dough, roll it out onto a parchment-lined baking sheet to your desired thickness. Top with a few spoon fulls of pesto (evenly dispersed), cooked ground sausage and half of the grated parmesan. Bake for 20 minutes. If using an already baked flatbread or other bread like naan, repeat steps with pesto, sausage and parmesan and bake for only 10 minutes.Remove flatbread from the oven and increase oven heat to 425F. Top flatbread with peperonata and remaining grated parmesan. Bake for another 6-8 minutes.Carefully remove the flatbread from the oven, drizzle with more pesto and garnish with chopped basil or parsley.Slice flatbread as desired and serve. Appetizer, Dinner, Main Course, Main DishAmerican, Cajun, ItalianSausage, Pesto & Peperonata Flatbread
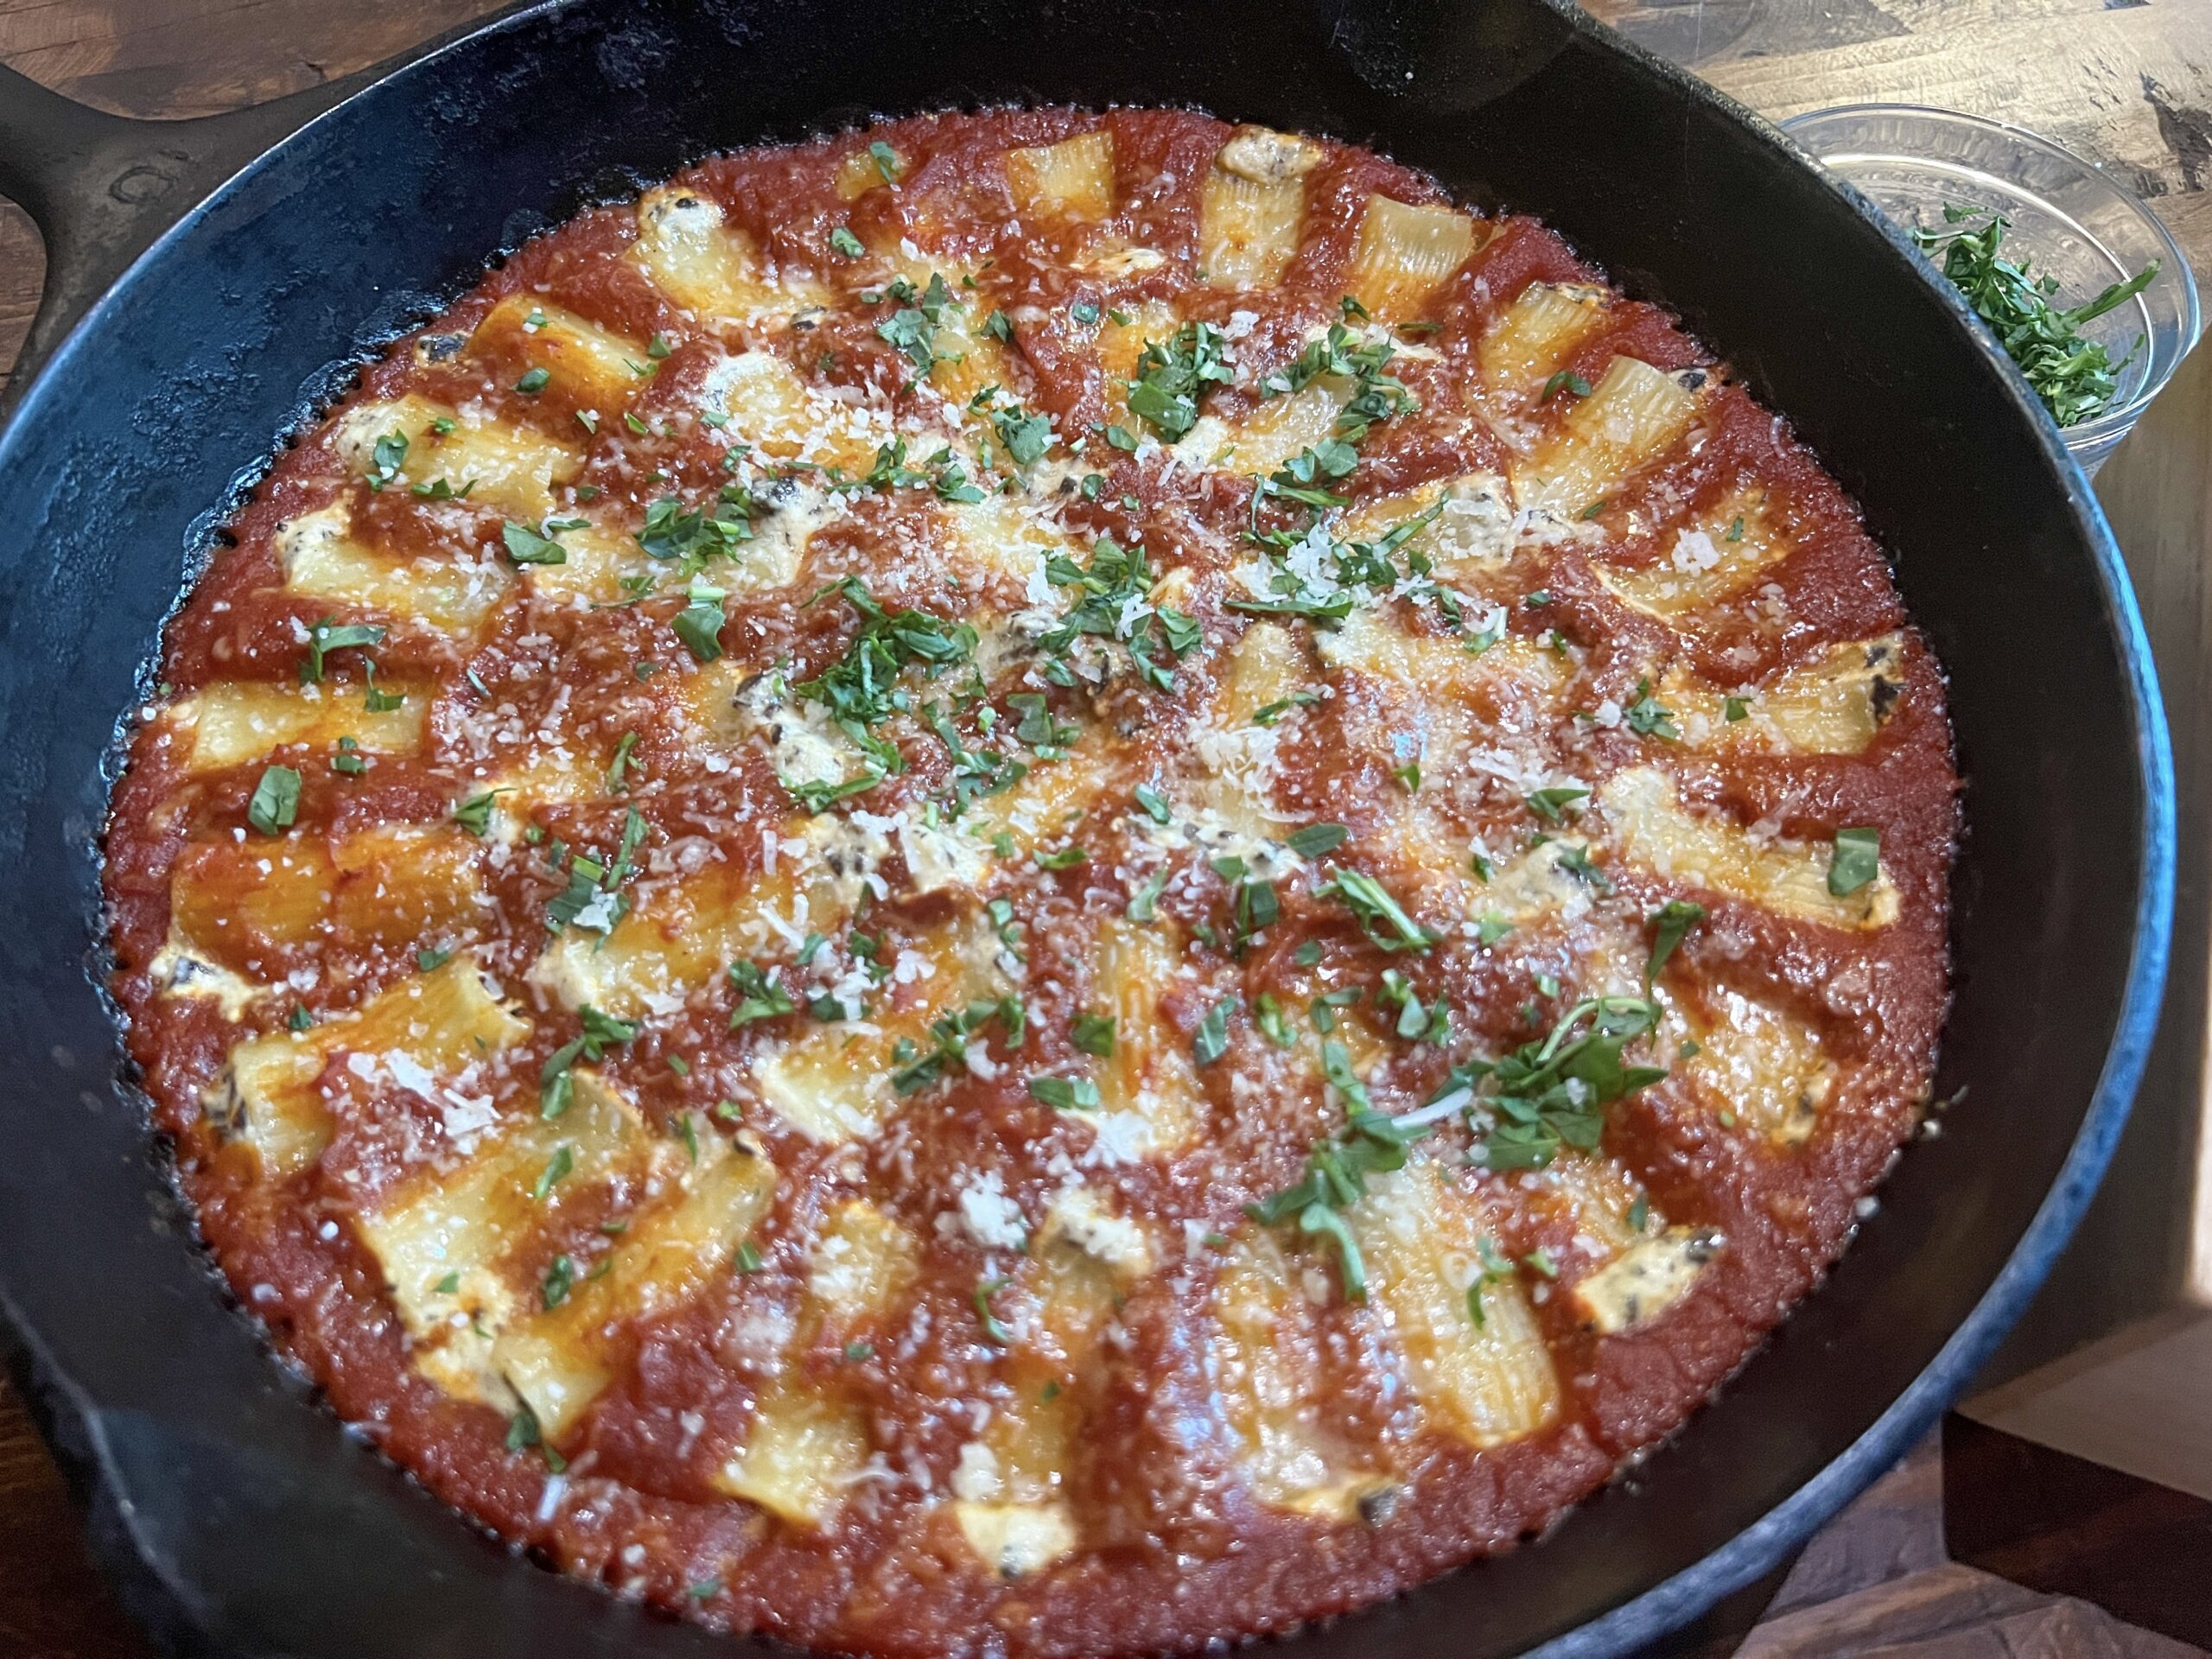
The temperature here in Florida may still be quite warm, but it is in fact fall and I can’t help but shift into comfort-cooking mode. For me, that means that lots of pasta dishes and comforting soups are frequently in the dinner rotation. A few months ago, I made stuffed rigatoni for the first time and fell in love with both the process of making it and the end result. The rigatoni was filled with a mixture of ricotta, mozzarella and provolone cheese and minced mortadella and was served in a spicy tomato sauce. While enjoying this dish, a number of alternative filling possibilities entered my mind and a simple mixture of ricotta and mushroom was one of the first. I’ve been making marinara at least once (sometimes twice) per month, usually on Sundays, for at least ten years now. Over the course of these ten years, tweaks and changes have been made to the recipe and a few years ago, I landed on what works best for my taste. The ingredient list is simple, but depends heavily on quality ingredients – like premium whole peeled tomatoes, 24 month parmigiano reggiono rinds and some good red wine. Luckily, Rollin’ Oats is a mecca for premium ingredients. For the sauce, they have a few canned tomato offerings that I recommend, like Cento and also organic variations from Muir Glen and Bionature. And we all know that they have a wonderful selection of great wines to choose from and a few experts on their staff to help you make a selection. You’re only using 1/4 cup in this recipe, but I always recommend using a wine that you would drink when cooking. You could undoubtedly assemble this recipe on a weekday, however, I think it is best enjoyed on a slow Saturday or Sunday. In the recipe, I suggest cooking the sauce for at least an hour, but you can definitely allow it to simmer for up to a few hours. The smell of marinara flowing through the home is one of my favorite scents ever. You can use this sauce in many other recipes like meatballs, chicken parmesan or other pastas of course like spaghetti. Ricotta & Mushroom Stuffed Rigatoni Recipe This comforting pasta dish is comprised of rigatoni that is stuffed with a mix of creamy ricotta cheese and savory mushrooms that is then baked in a simple marinara sauce. ovensafe skillet or large dutch ovenBlender Marinara1 tbsp olive oil1/2 white onion (medium in size, roughly chopped)3 garlic cloves (peeled and crushed)1 tsp dried oregano2 tbsp tomato paste1/4 cup red wine (pick a red that you would drink)2 bay leaves1 28oz can crushed or whole peeled tomatoesparmesan rind (optional)1 tsp salt (plus more to taste)Ricotta & Mushroom Filling1 tbsp olive oiltsp tsp salt (divided)8 oz mushrooms (diced into very small pieces – shiitake, baby bella, or most any other mushroom will work)10 oz ricotta cheese1 eggRigatoni & Assembly16 oz rigatoni (you may have leftover rigatoni – save them for another use)1 tbsp olive oil1/4 cup parmesan (grated)1/4 cup fresh basil (roughly chopped or torn) Ricotta & Mushroom FillingHeat 1 tbsp olive oil over medium heat. Add mushrooms and 1/2 tsp salt and cook, stirring occasionally, until liquid from mushrooms has evaporated completely – about 10-12 minutes.Add cooked mushrooms to a bowl with ricotta, beaten egg and remaining 1 tsp salt. Allow mixture to cool in the refrigerator while you prepare the marinara.After filling has cooled for an hour, add filling to a sandwich-sized ziplock bag. Cut a very small opening into one corner of the bag (smaller than the size of the opening of the rigatoni).MarinaraHeat a dutch oven or pot that is medium in size over medium heat. Add 1 tbsp olive oil and chopped onion. Cook onion, stirring occasionally, until it softens (6-8 minutes). Season with 1/2 tsp salt.Add in crushed garlic cloves and dried oregano and cook for one minute, stirring constantly, until fragrant – about one minute. Stir in tomato paste and cook until it takes on a brick red color. Pour in wine, deglaze pan, and allow the wine to reduce for 2-3 minutes. Add bay leaves, tomatoes, parmesan rinds (if using) and another 1/2 tsp salt to the pot and stir to combine.Bring marinara to a simmer, reduce heat to medium low, and allow sauce to simmer gently for about one hour. Season with more salt as needed. After an hour, discard bay leaves and parmesan rinds and blend sauce with an immersion blender or in a high powered blender until smooth. Add sauce to a large oven-safe skillet (like cast iron) or a large dutch oven and set aside until ready to fill rigatoni.Rigatoni & AssemblyHeat oven to 350 F. Cook pasta 1-2 minutes less than package instructions (you want an al dente texture to keep the rigatoni from ripping – they will cook further in the final steps of the recipe in the oven). Strain and rinse with cold water, add to a large bowl and toss with 1 tbsp olive oil to keep the rigatoni from sticking together.One at a time, pipe filling mixture into each piece of rigatoni and arrange in a single layer in prepared skillet/dutch oven with pureed marinara until you run out of room (you want to nestle them into the sauce so they are mostly covered).Repeat with remaining pieces of rigatoni. Distribute half of grated parmesan over the stuffed rigatoni in marinara.Place skillet into the oven until cheese melts and begins to take on a light golden color- 20-25 minutes. Top with remaining grated parmesan and basil and serve immediately. Dinner, Main Course, Main DishAmerican, ItalianRicotta & Mushroom Stuffed Rigatoni
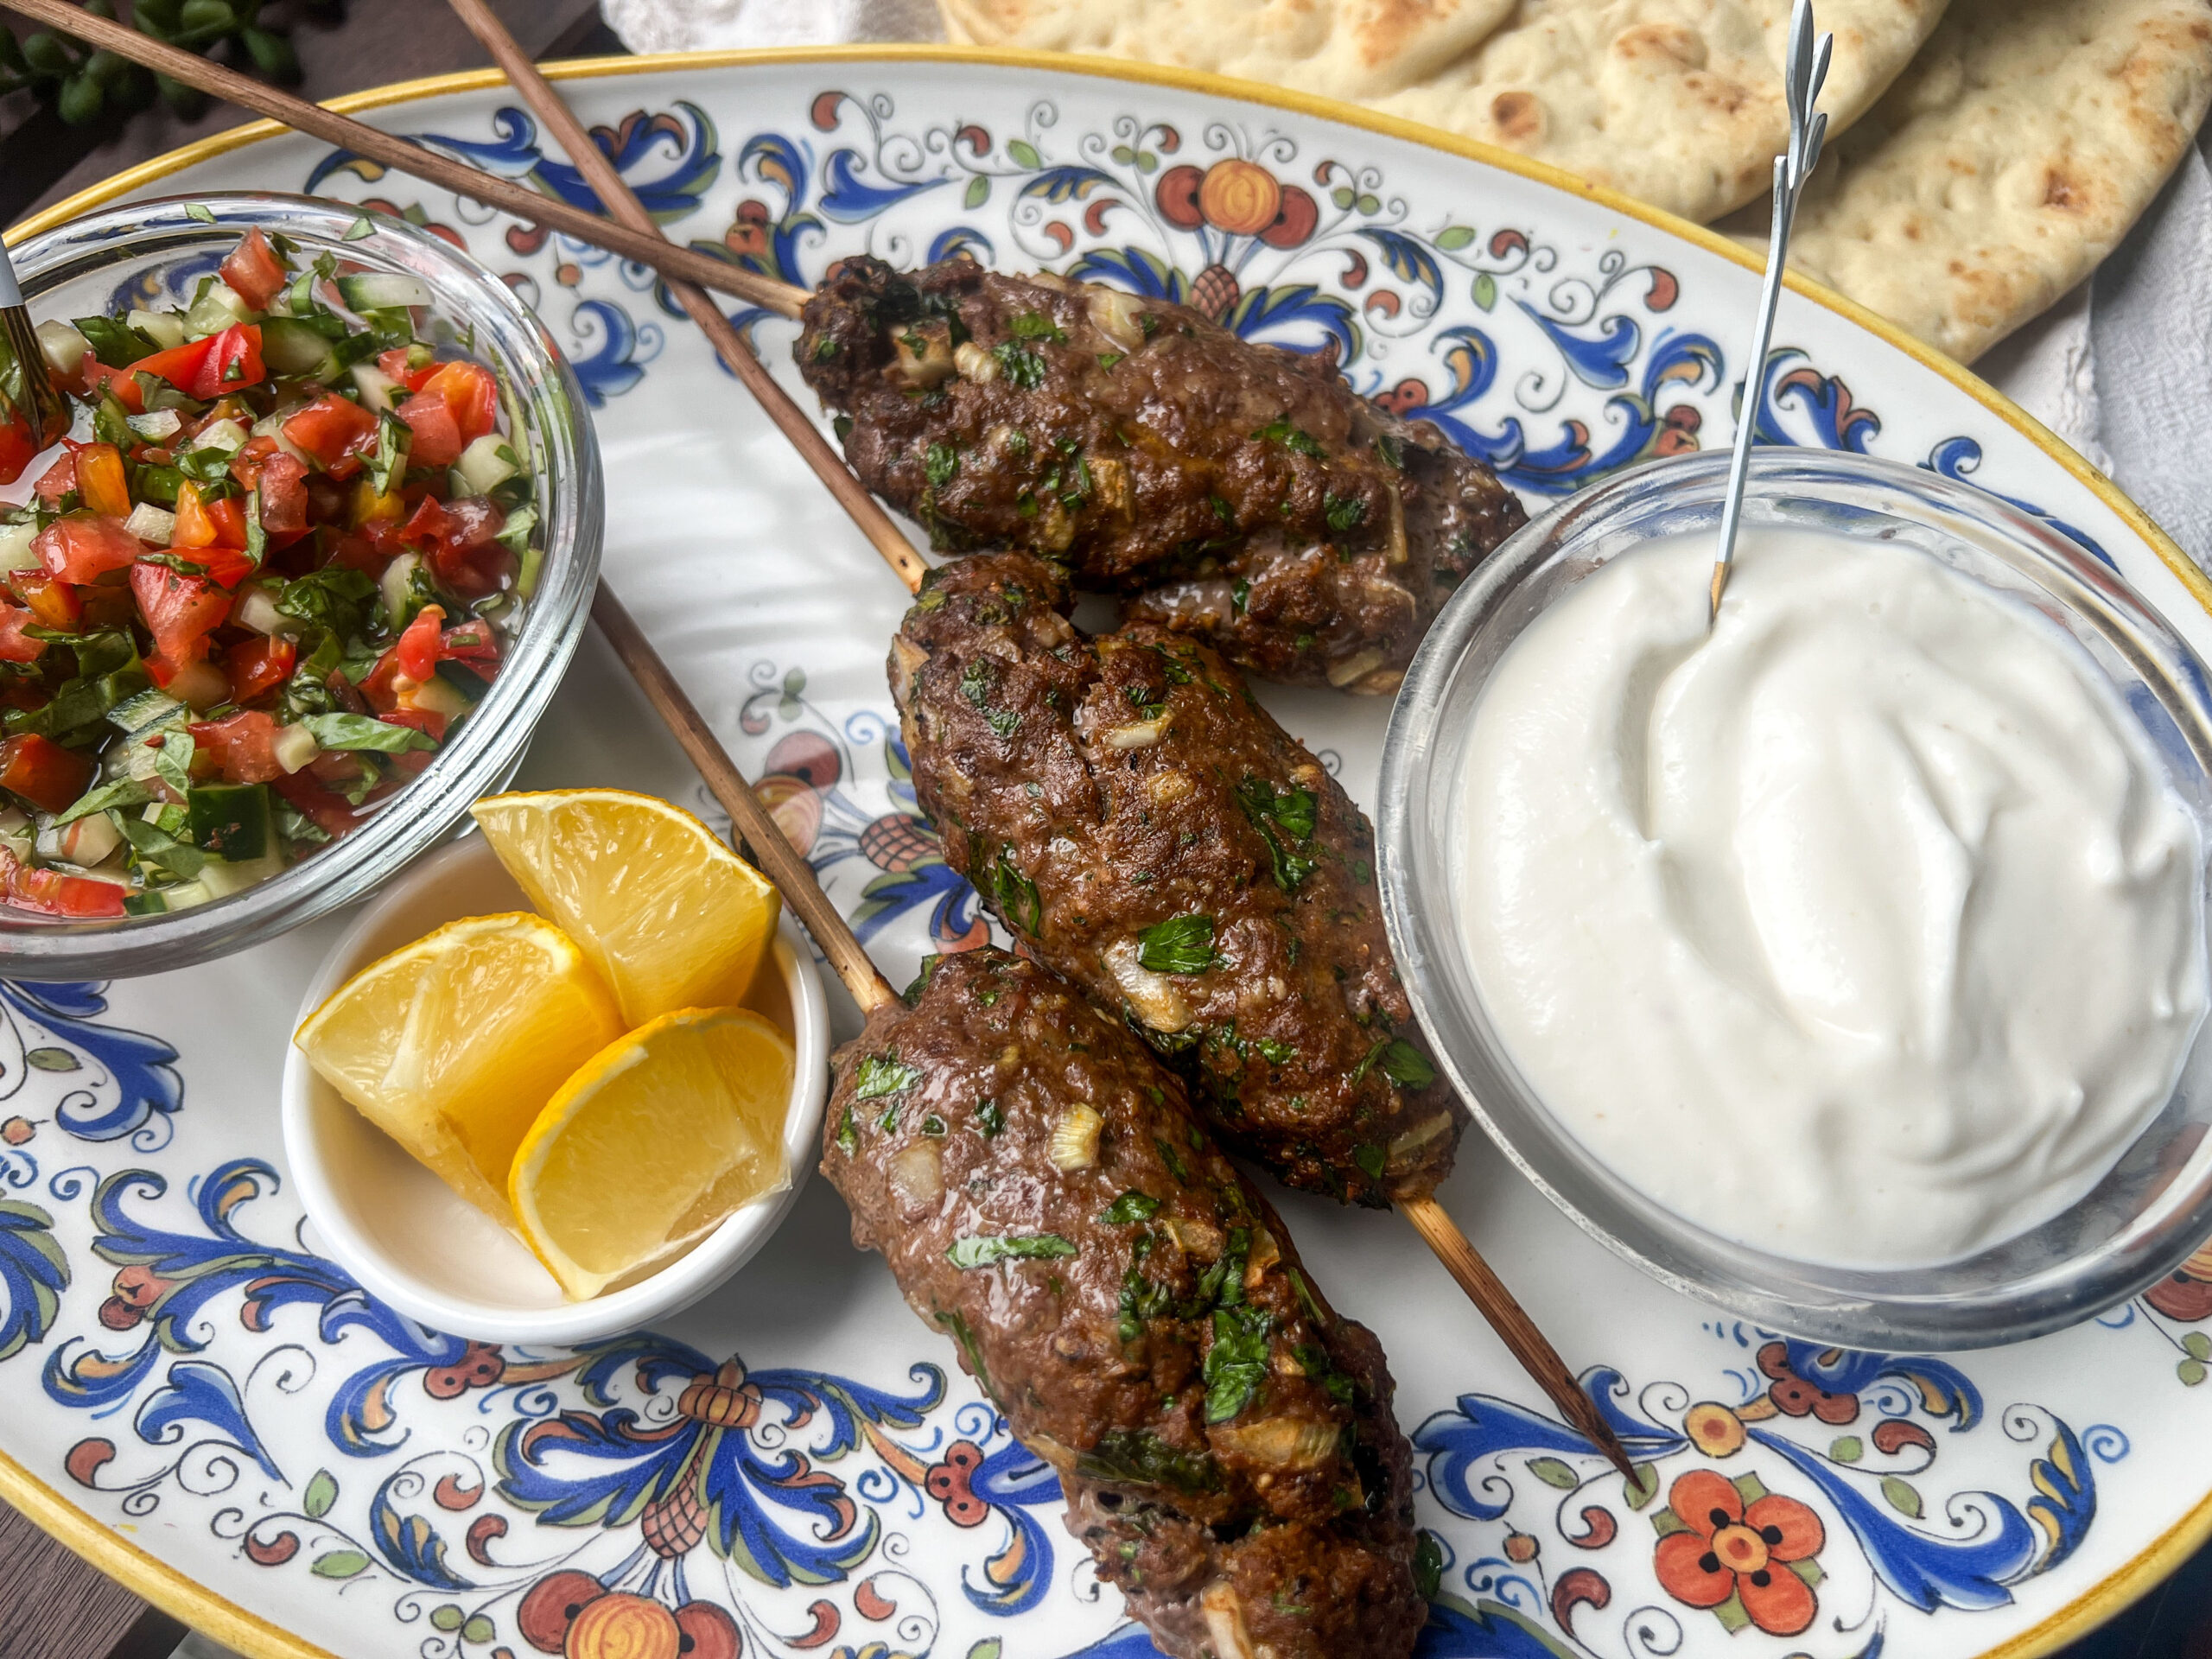
Elevate your appetizer game with these beef kofta skewers that are laced with irresistible spices and baked to juicy perfection. A drizzle of zesty toum sauce adds a garlicky kick, while a cucumber and tomato salad brings a refreshing crunch that complements the meat beautifully. Serve this all with some warm naan bread to round out the dish. Kofta is a popular Middle Eastern dish that is typically made from ground beef, lamb or chicken that is mixed with spices, herbs and often garlic and onion. The mixture is then formed onto skewers and usually grilled or sometimes baked. Kofta is often served with rice, flatbreads, vibrant salads and a sauce like tahini or toum. There are many different variations and it is a beloved dish across many different cultures. I like to serve kofta as an appetizer for a group and often as an entree for my husband and I. My sauce of preference with kofta is usually a homemade toum sauce. Toum sauce is a recent discovery of mine that I had while dining with friends and after one taste, I knew that I loved it and needed to recreate it. It’s a creamy and flavor-packed condiment that is made from a few simple ingredients – a head of garlic, neutral oil, lemon juice and salt. The mixture is formed in a food processor until a creamy sauce forms (similar to the consistency of yogurt). We use ground beef in this kofta variation – a very high quality organic and grass-fed ground beef that can be found at Rollin’ Oats. They have a few different options, but I prefer the Simply Balanced 90/10 selection. Quality is always of the utmost importance to me when it comes to sourcing any ingredient that I use and I can always trust Rollin’ Oats to have the absolute best. Beef Kofta with Toum Sauce Recipe Savor the spiced flavors of juicy beef kofta paired with a garlicky, creamy toum sauce that elevates this Middle Eastern dish to a whole new level. skewers Beef Kofta1 lb ground beef1/4 cup white onion (minced)2 tsp garlic (minced)1/4 cup parsley and mint (finely chopped)1 tbsp olive oil2 tsp all spice2 tsp paprika1 tsp cumin1 tsp coriander 1 tsp salt1/2 tsp cinnamon1/2 tsp black pepperToum Sauce1 cup garlic cloves (peeled)3 cups neutral oil (grape seed, sunflower, vegetable or canola)1/2 cup lemon juice2 tsps Kosher saltCucumber & Tomato Salad1 tomato (ripe, medium in size & diced)1/2 cup cucumber (diced)1/4 cup basil (finely chopped)1/2 tsp salt (plus more to taste)To Servenaan breadlemon wedges Toum SauceSlice the garlic cloves in half lengthwise and remove any green sprouts. Transfer the sliced garlic cloves into a food processor and add the kosher salt to the garlic cloves. Process for a minute until the garlic becomes finely minced. Make sure to scrape down the sides of the food processor afterwards. While the food processor is running, slowly pour one to two tablespoons of oil, then stop and scrape down the bowl. Continue adding another tablespoon or two until the garlic starts looking creamy.Once the garlic looks emulsified by the few tablespoons of oil, increase the speed of pouring the oil and alternate with the ½ cup of lemon juice until all the oil and lemon juice is incorporated. This will take about 15 minutes to complete.Transfer the sauce into a glass container and cover with a paper towel in the fridge overnight. Makes about 4 cups. The next day, replace the paper towel with an airtight lid and keep in the fridge for up to 3 months.Cucumber & Tomato SaladCombine all ingredients in a bowl, season with salt and refrigerate until the kofta is finished.KoftaIf you're using wooden skewers, soak them in water for at least 20 minutes. This will prevent burning. Combine all kofta ingredients in a medium-sized bowl with your hands until everything is mixed well. Refrigerate the mixture for 30 minutes. Heat the oven to 450F. Place a wire rack onto a baking sheet and brush it with olive oil. After the mixture has been in the refrigerator for at least 30 minutes, divide it into four even-sized portions. Form each portion into a snake-like shape around each skewer.Bake the kofta for 13-15 minutes or until the beef is cooked through and beginning to brown on top.To ServeServe kofta on a platter with naan, cucumber and tomato salad, toum and lemon wedges. Appetizer, Dinner, Main DishMiddle EasternKofta, Toum Sauce, Baked Kofta
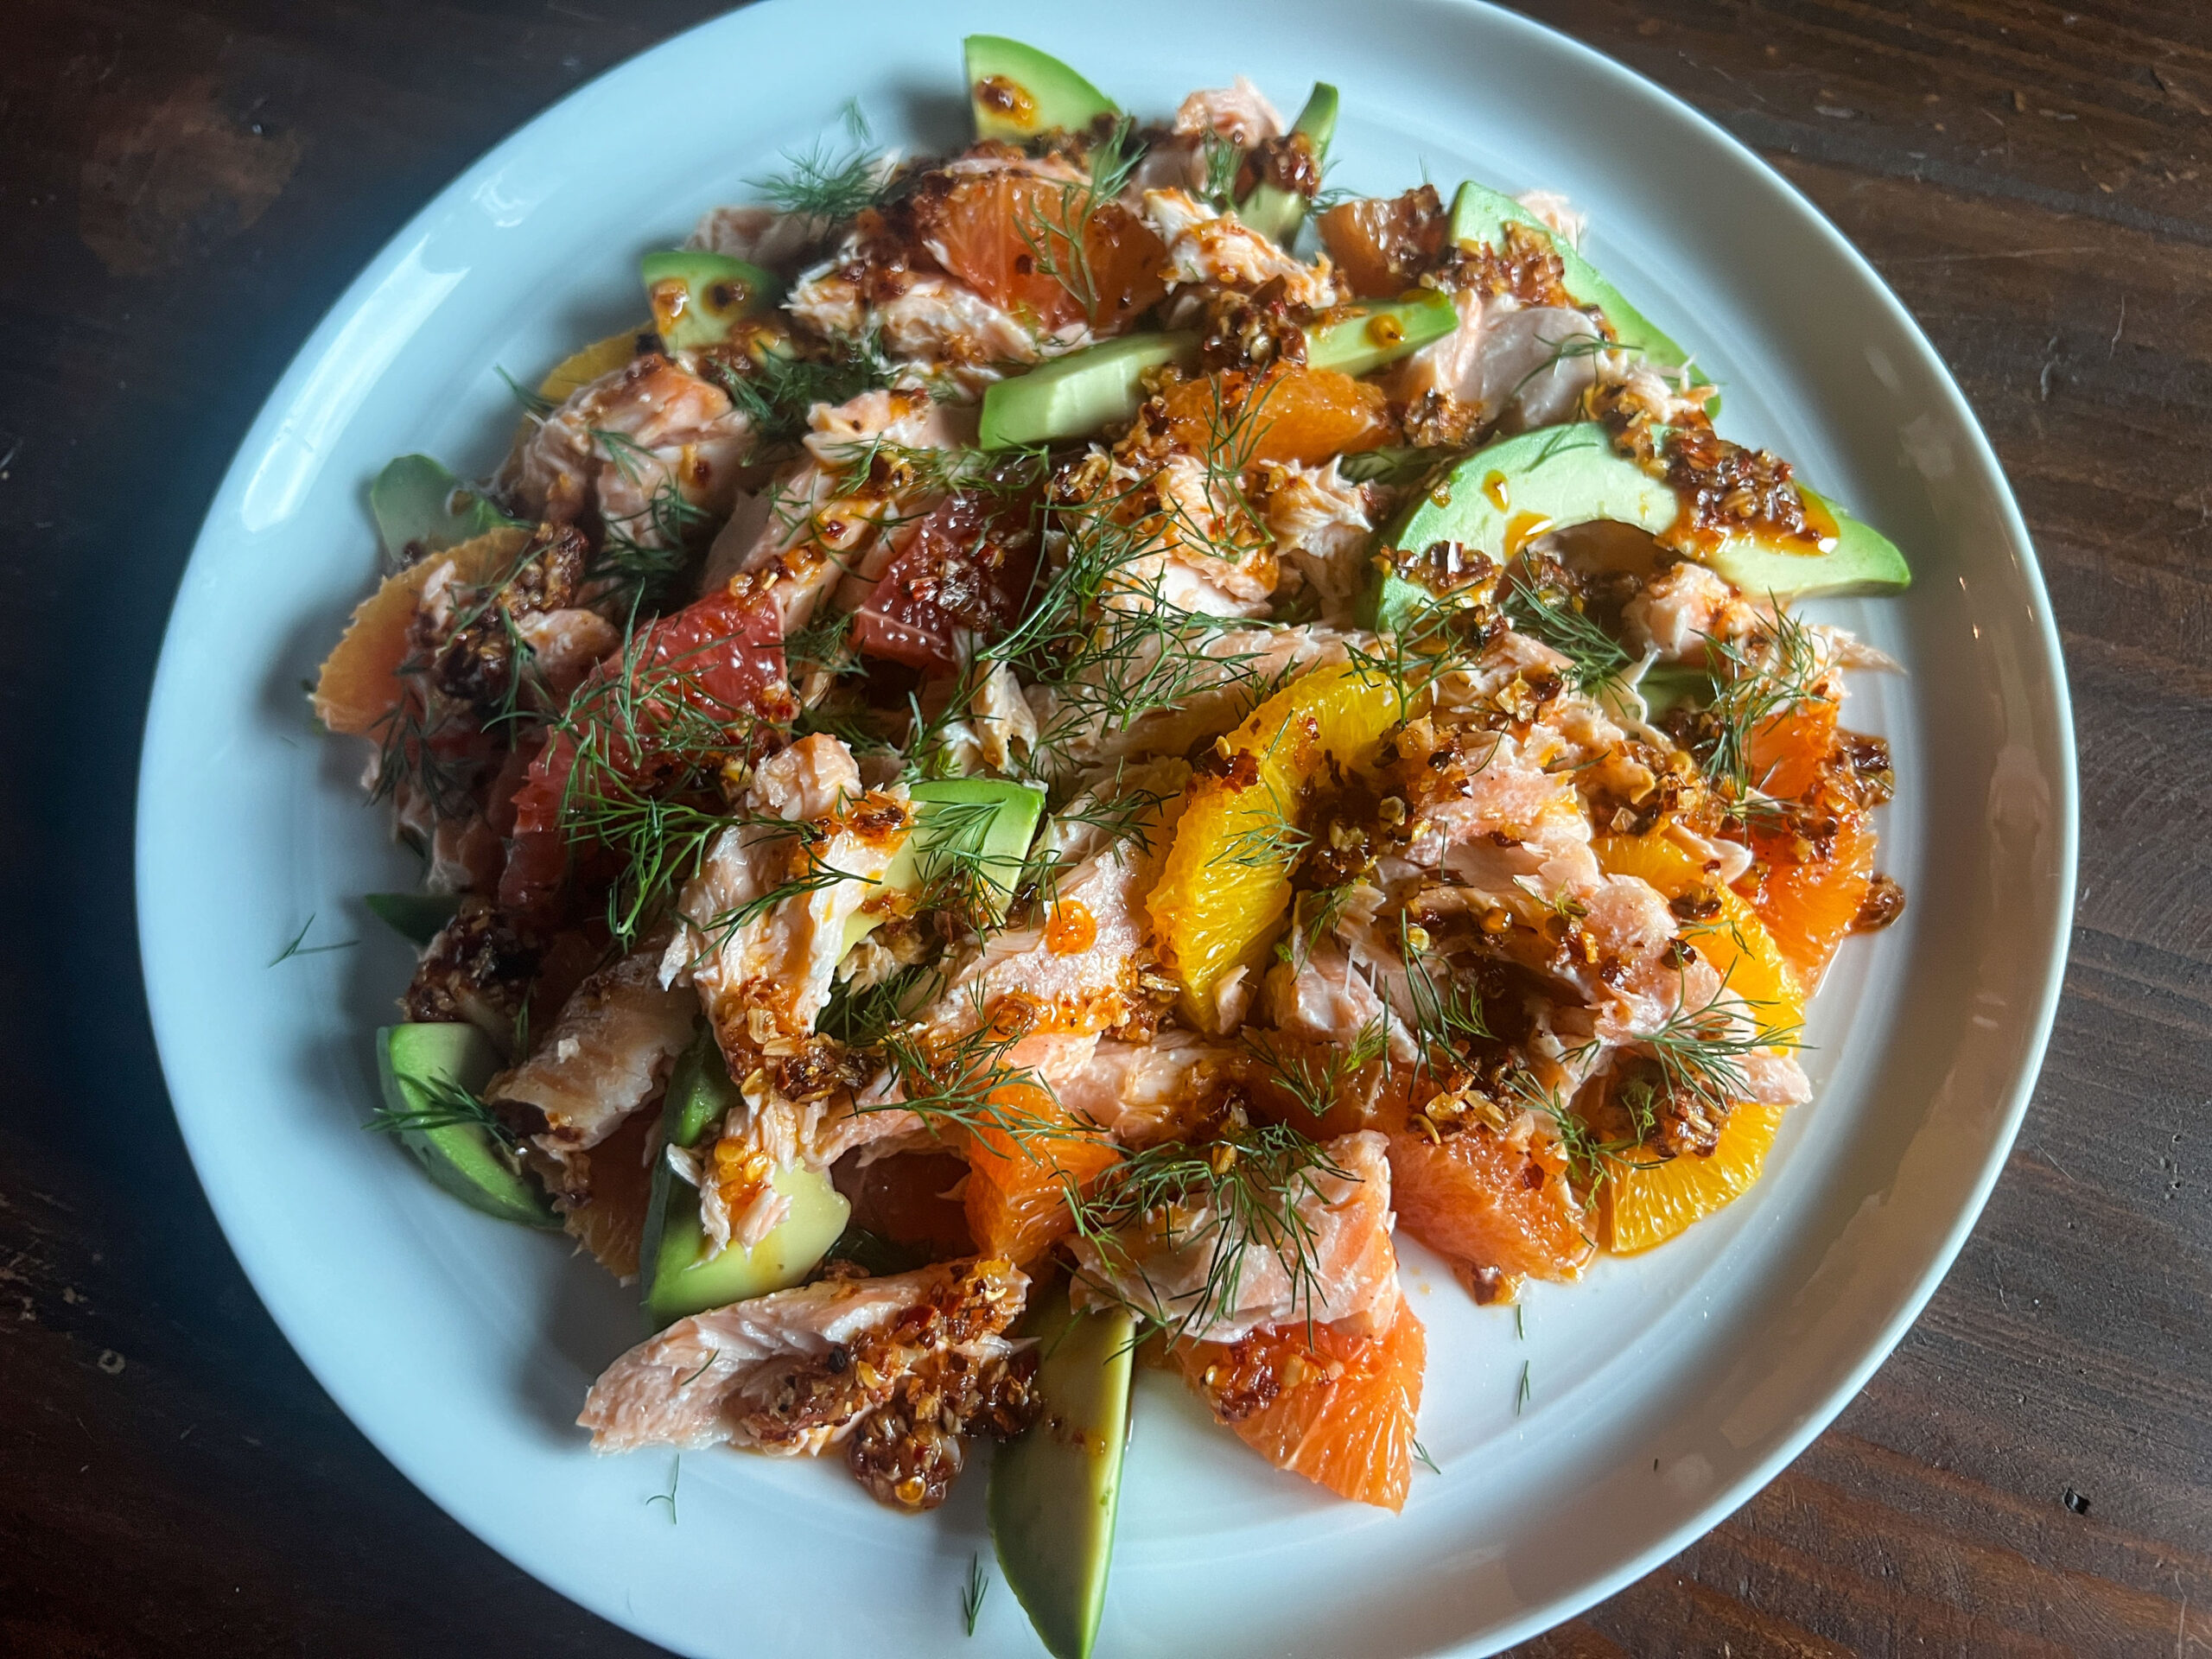
Low effort and high reward is the name of the game with this take on slow-roasted salmon. The slow-roasting process ensures tender and flakey salmon that melts in your mouth with each bite. The addition of citrus makes this dish quite refreshing while the chili crunch sprinkles in bold and spicy notes. Though the ingredients involved are minimal, together they are the utmost well-balanced. There isn’t a ton of produce in season right now in Florida, but citrus, including orange varietals and grapefruit are goods that you’ll find plenty of during this time of year. Marrying together the invigorating flavors in citrus with a high-quality, fatty piece of wild salmon is quite lovely. The chili crunch aids in adding some texture and the torn fresh dill (or basil) rounds out the dish. Avocado, which is also in season in September, pairs well with all of these ingredients too. If you’d like to also incorporate that, use 1/2 of a ripe avocado and slice it into thin pieces. You can certainly go the extra mile by making your own variation of chili crunch or chili crisp (trust me, it’s much easier than you may think!), but there are plenty of solid options on grocery store shelves these days. One of my favorites is from Momofuku and you can find this at Rollin’ Oats (it’s actually on sale currently). They offer a regular chili crunch, spicy and also a hot honey version. Another reputable brand at Rollin’ Oats is by Mr. Bing – they have a mild and spicy option. When it comes to selecting your salmon, I always suggest reaching for the wild caught versus the farm raised. Rollin’ Oats doesn’t have a dedicated seafood counter; however, they offer quality frozen wild caught salmon that works great for this dish. Just make sure to safely thaw the salmon prior to roasting it. Slow Roasted Salmon with Citrus & Spicy Chili Crunch Recipe Discover a new favorite low-effort dinner with this slow-roasted salmon which is paired with vibrant bits of citrus and a spicy assist from chili crunch. 16 ounces salmon (skin on and preferably wild-caught – 1 large piece or two 8 ounce pieces are recommended)1 tsp olive oil1/2 lemon (sliced into thin rounds)1 grapefruit (peel and pith removed and cut into thin rounds and then into halves and quarters)1 orange (peel and pith removed and cut into thin rounds and then into halves and quarters)1/2 tsp salt (plus more, to taste)2 tbsp chili crunch (plus more as needed – choose your favorite brand – I love Momofoku which can be found at Rollin' Oats)dill or basil (fresh & torn into smaller pieces (garnish, optional))avocado (sliced (optional)) Heat oven to 250F. Line a baking sheet with parchment paper. Place the salmon on the lined baking sheet brush with olive oil, season with salt and top with the lemon slices.Roast the salmon for an hour and remove from the oven – the salmon should be quite tender and should pull easily away from the salmon's skin in pieces. Don't worry about keeping the salmon filet in one piece – we want it to flake a bit into chunks.To plate, arrange the flaky salmon pieces with citrus and avocado (if using) on a serving platter – there is no right or wrong way to do this, so feel free to get creative with your plating. Top with 2-3 spoon-fulls of chili crunch and garnish with torn dill or basil. Season with more salt as desired. Dinner, Main Course, Main DishAmericanSlow Roasted Salmon, Slow Roasted Salmon with Citrus & Chili Crunch
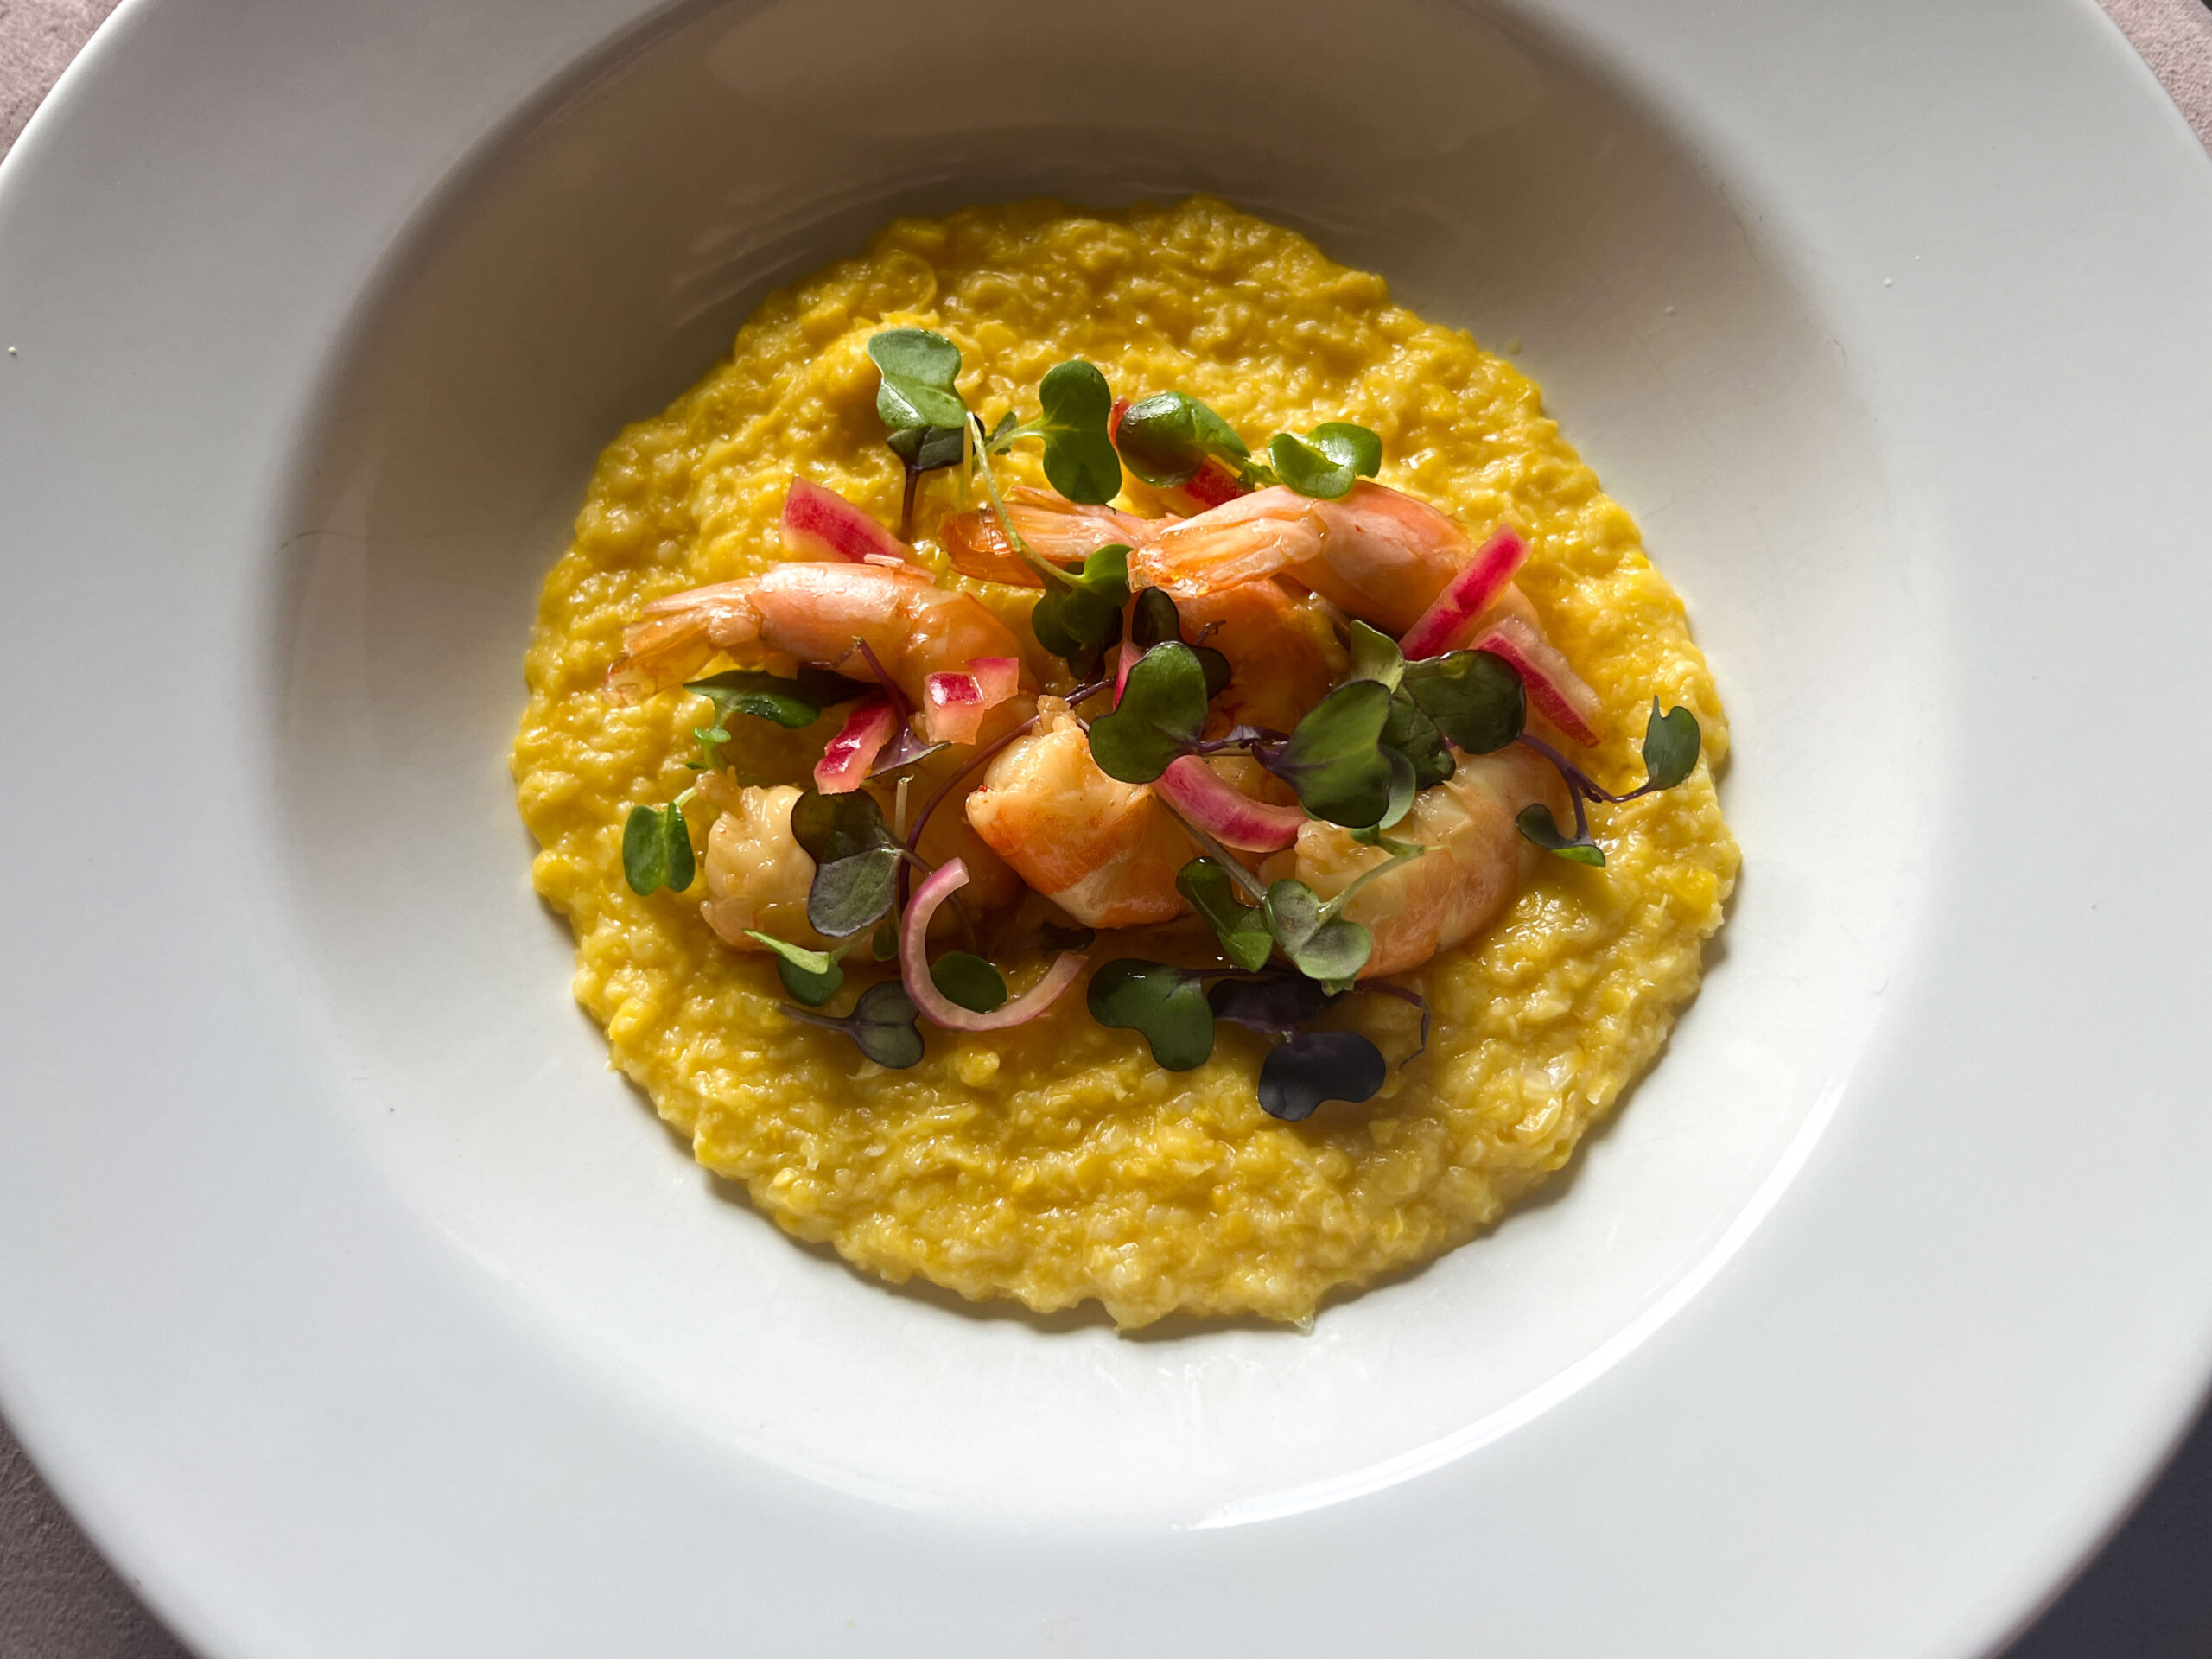
Fresh Corn Polenta with Pickled Shrimp brings together the sweetness of summer corn and the tangy notes of pickled shrimp. This recipe offers a brighter twist on traditional comfort food. This take on polenta acts as an idyllic canvas for the zesty shrimp which are pickled and marinated in a myriad of ingredients which include, but are not limited to: rice wine vinegar, citrus, crushed red pepper flakes and garlic. It’s a perfect dish for highlighting popular ingredients that are used a lot in summer cooking. Creating the fresh corn polenta could not be more simple and only requires a few ingredients that you probably already have on hand. I first made this polenta a couple of weeks ago after I picked up some corn from a farmer’s market in the area. I was told that the corn had just been harvested the day prior from a farm here in Florida. The method for making the fresh corn polenta was something that I had been wanting to experiment with. It all starts by peeling the corn and then grating it with the large holes on a boxed grater. From there, the grated corn mixture is then simmered with a couple of pats of butter and some salt until the polenta thickens a bit. This process only takes about ten minutes. The polenta is then finished with a squeeze of fresh lime. Initially, I had planned to top the fresh corn polenta with poached lobster and some chive butter (which I will be trying soon), but then I found some inspiration for pickled shrimp from a recent episode of a food-related show on television (The Lost Kitchen, for those interested). The shrimp are first poached in some water, lemon and salt. Then, they are placed in a pickling mixture in the refrigerator for a few hours (and up to 24 hours). The pickling mixture makes for tangy and flavorful shrimp that not only work well on this polenta, but also with many other things. These shrimp would work well on some toasty sourdough, tossed in a salad, nestled in some rice or simply on their own as an easy appetizer. For the shrimp, I always strive to use wild caught, but use whatever you can find. Rollin’ Oats has great quality frozen shrimp by Baywinds and Wixter Seafood. Simply thaw the shrimp and devein them with the shells on if they aren’t already deveined (this is easier to do than you think – use a wooden skewer or toothpick, poke it through the side of the shrimp in the middle towards the top and slowly thread and pull the vein out – give it a google for a tutorial). You can also use shrimp that are already peeled and deveined too, but cooking the shrimp with their shell on adds to the flavor and prevents overcooking of the shrimp. Fresh Corn Polenta with Pickled Shrimp Recipe Put summer's fresh corn to good use with this fresh corn polenta recipe. The pickled shrimp add a zesty zing when served atop the creamy polenta. glass bowl or glass Tupperware Poaching the Shrimp12 shrimp (medium to large in size – shell on, but deveined (optional, you can use peeled shrimp if you prefer))6 cups water6 cups ice1 lemon (cut in half)2 1/2 tbsp saltPickling the Shrimp3/4 cup rice wine vinegar2 tbsp sugar2 garlic cloves (peeled and smashed)1/2 tsp crushed red pepper1 dried bay leaf1/2 cup olive oilt tsp worcestershire 1 tsp salt1/2 tsp hot sauce (use your preference – I usually opt for Diamond Crystal)1/2 lemon (sliced into small wedges)1/4 cup red onion (sliced thin)Fresh Corn Polenta4 ears corn (husk and silk removed)2 tbsp butter1/2 tsp salt (plus more to taste)1/2 limeDish Assemblymicro-greens (for garnish – fresh dill would work well too (optional)) Pickling the ShrimpAdd vinegar, sugar, garlic, crushed red pepper and bay leaf to a microwave-safe bowl or glass measuring cup. Heat mixture for two minutes, stir to combine and cool completely in the refrigerator (30 minutes to an hour).When mixture is cool, stir in olive oil, worcestershire, hot sauce and salt. Then, mix in lemon wedges and sliced onions. Set aside until poached shrimp are ready.Poaching the ShrimpAdd water, juice lemon and lemon halves and salt to a medium pot and bring to a boil.Add deveined shrimp, remove pot from heat and allow shrimp to poach for 5 minutes (or until they turn pink).Add in ice and allow to sit for another 10 minutes.Remove shrimp from pot and discard water and lemon. Peel shrimp (leave tails on if desired, optional) and place into glass bowl or Tupperware for pickling.Pour prepared pickling mixture over the shrimp. Cover shrimp and place in the refrigerator for at least three hours and up to 24 hours.Fresh Corn PolentaGrate corn on the cob with the large holes of a box grater over a medium-size bowl.Heat grated corn, butter and salt over medium heat. Cook, stirring occasionally, until corn mixture thickens – about ten minutes. Taste and season with more salt as needed (polenta should now taste a bit more rich). Remove from heat and stir in juice of 1/2 lime.AssemblyTo plate, add 1/4 corn polenta mixture to each bowl, top with pickled shrimp and garnish with micro-greens or fresh dill. Appetizer, Dinner, Main DishAmericanFresh Corn Polenta, Pickled Shrimp


